Rename Sheet
Use this action to rename a sheet from an existing workbook.
Overview
Use this action to rename a sheet from an existing workbook.
How to configure the Rename Sheet action?
Step 1. Create a process and give it a name.
Step 2. Drag the Rename Sheet action to the canvas and link it to the other actions.

Step 3. Create the variables needed for the configuration of the action, and then add them to the configuration panel:
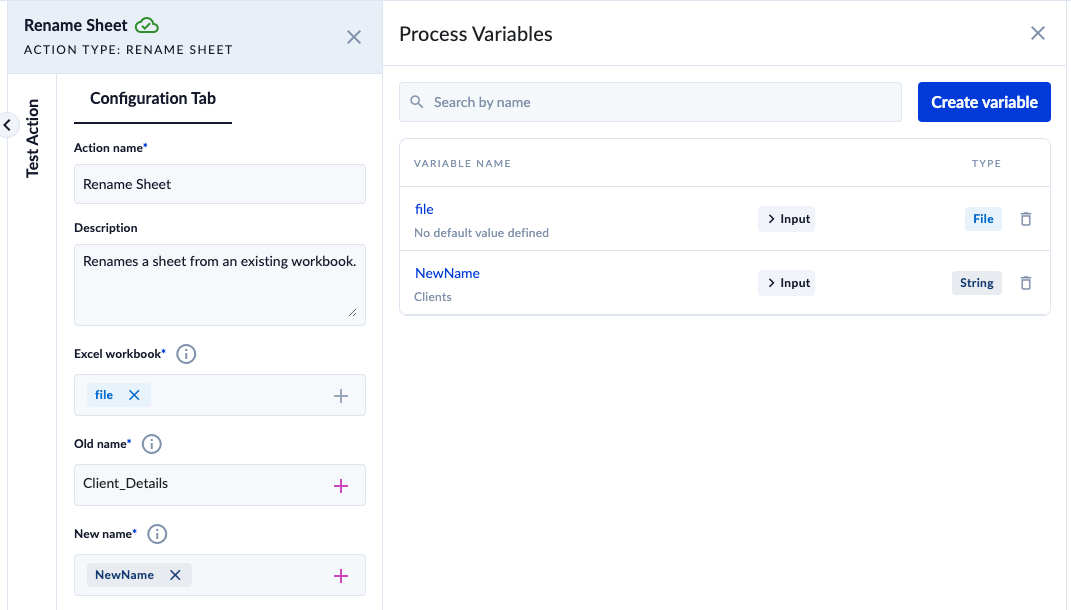
- Excel workbook: you need to input the file with the workbook where you want to rename a sheet
- Old name: you need to input a string with the Old name of the sheet (basically the sheet which you want to rename)
- New name: you need to input a string with the new name which will replace the old one
Step 4. Save, Validate and Run the process.
Step 5. You will be prompted to add the file for the input variable. Click Run.
Step 6. To verify the process click Check instance.
Step 7. The file contains the renamed sheet.