Send Email
Use the Send Email action to send a message (Body and Subject) to one or more recipients (To, CC and Bcc). The Send Email action gives you the…
Use the Send Email action to send a message (Body and Subject) to one or more recipients (To, CC and Bcc). The Send Email action gives you the possibility to include attachments along with your message.
PROCESIO integrates Send Email action with your email server configurations. This means that once you configure the Email server to use (check Working with Credentials Manager), you can start configuring the Send Email action in any flow.
How to configure the Send Email action?
Go to the Process Designers section and open a new or an existing process. Actions configuration can be performed once they are dragged and dropped on canvas.

Step 1: Drag the Send Email action from Toolbar and drop it on canvas; click on the action to open the Properties Panel.
Step 2: You can edit the Action Name.
Step 3: Select the Email server configuration in the properties panel. The Email server configuration needs to already be created upfront in Credentials Manager.
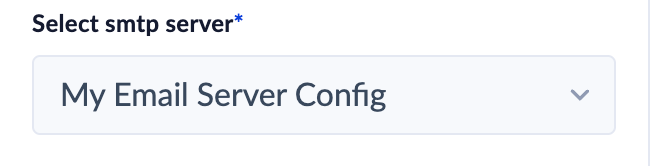
If the desired email server configuration is not created upfront, you have a shortcut in the selector to proceed to the Credentials Manager page.
Step 4: Click on the Send Email (not configured) card to go to the email configurations steps.
Step 5: Email configuration
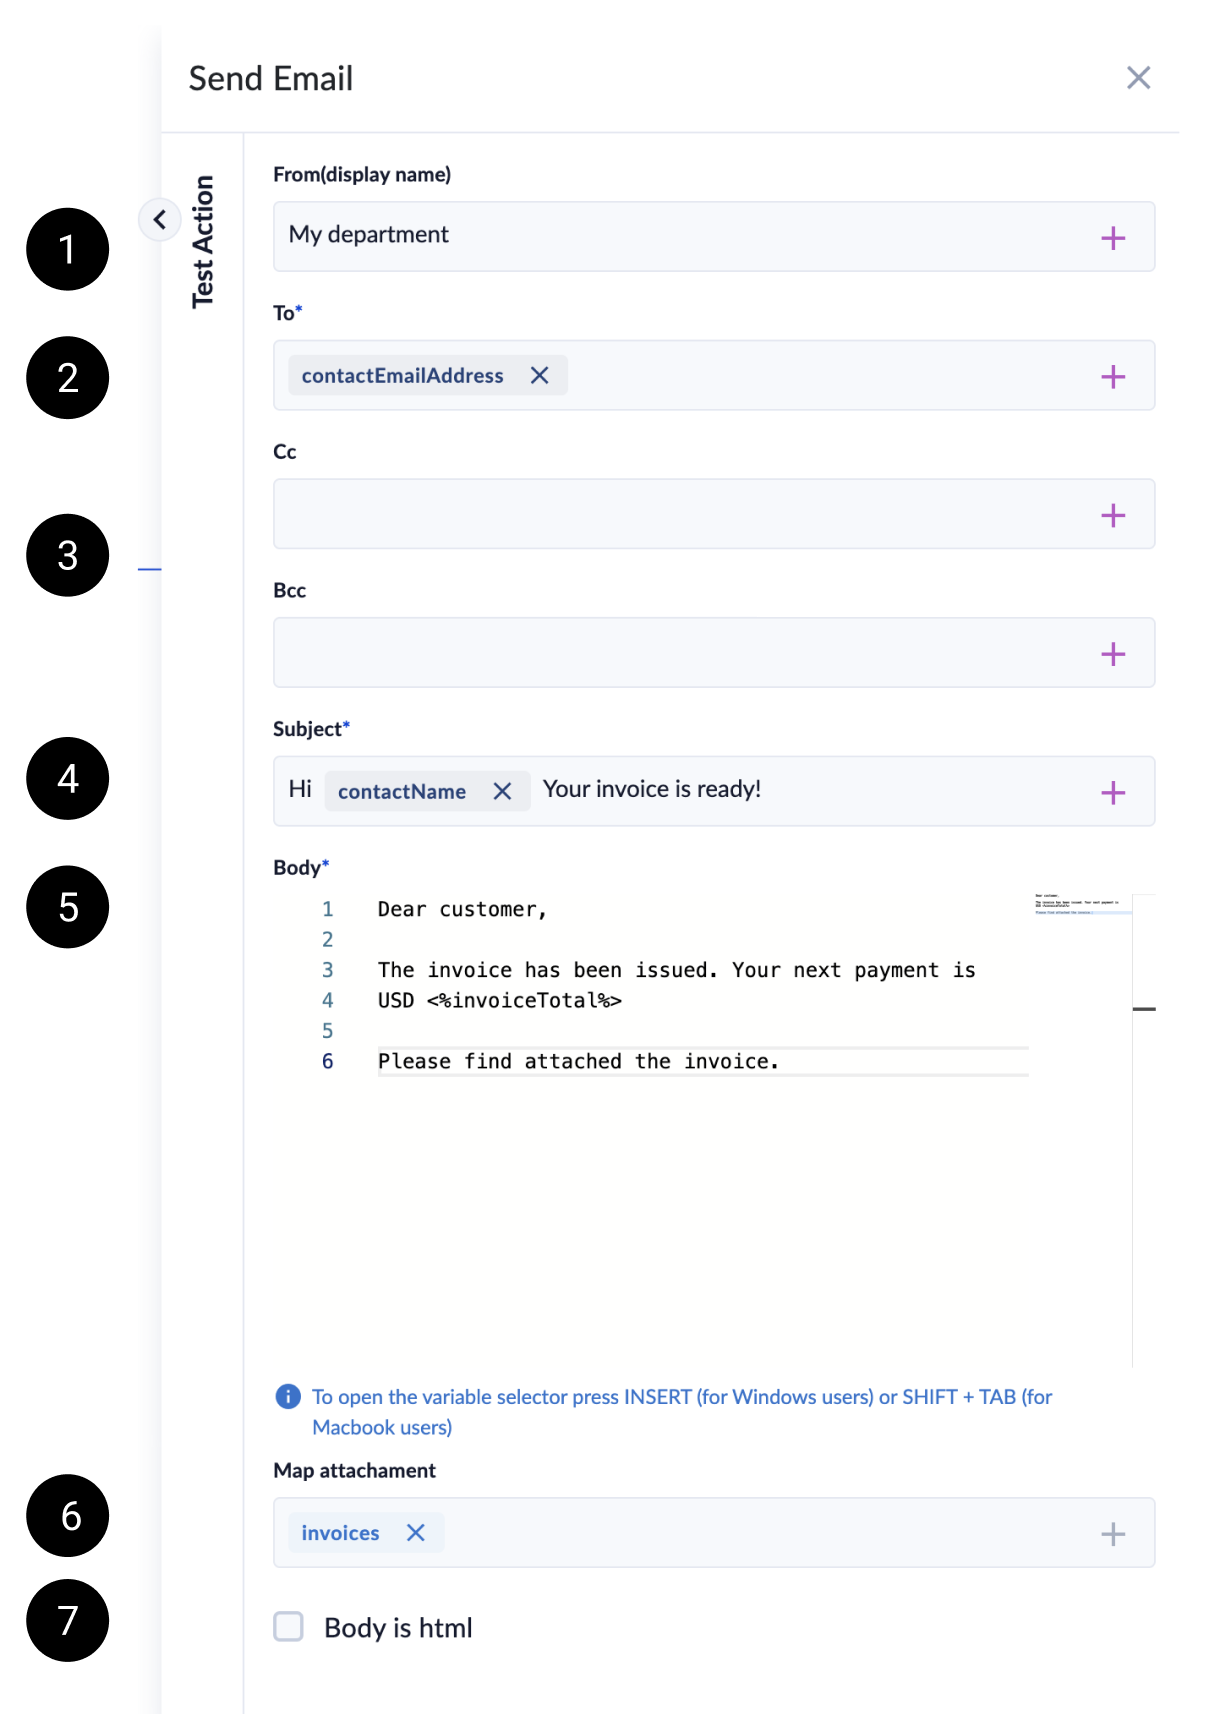
- Sender's display name: you can personalize the email sender's name which the receivers will see in their inbox; you can add a hard-coded name or call the name from a Process variable;
- To: add receivers name or list; you can manually fill in email addresses or use a Process variable;
- Cc & Bcc: If you wish to add additional receivers, enter their email address or use a Process variable;
- Subject: manually add a subject to your emails; Process variables can be used to dynamically update the subject while the action is processed;
- Body: type in the desired content for your emails;
- Attachment: you can add attachments to your emails;
- Checkbox Body is HTML: personalize the body of the email sent by creating HTML-formatted messages using a lot of controls and styles;
Step 6: Once the above steps are completed, you can proceed with saving the configuration by pressing "Save configuration" button.
Testing the Send Email action
You can check if the Send Email action is properly configured, users can try sending an email from the existing panel, by accessing “Test Action” section on sidebar. A new section dedicated for testing will be displayed. Here, you can see the process variables used in email configuration populated under “Variables”. You have to assign test values to the process variables under “Test values” taking into account their “Type” which is also displayed.
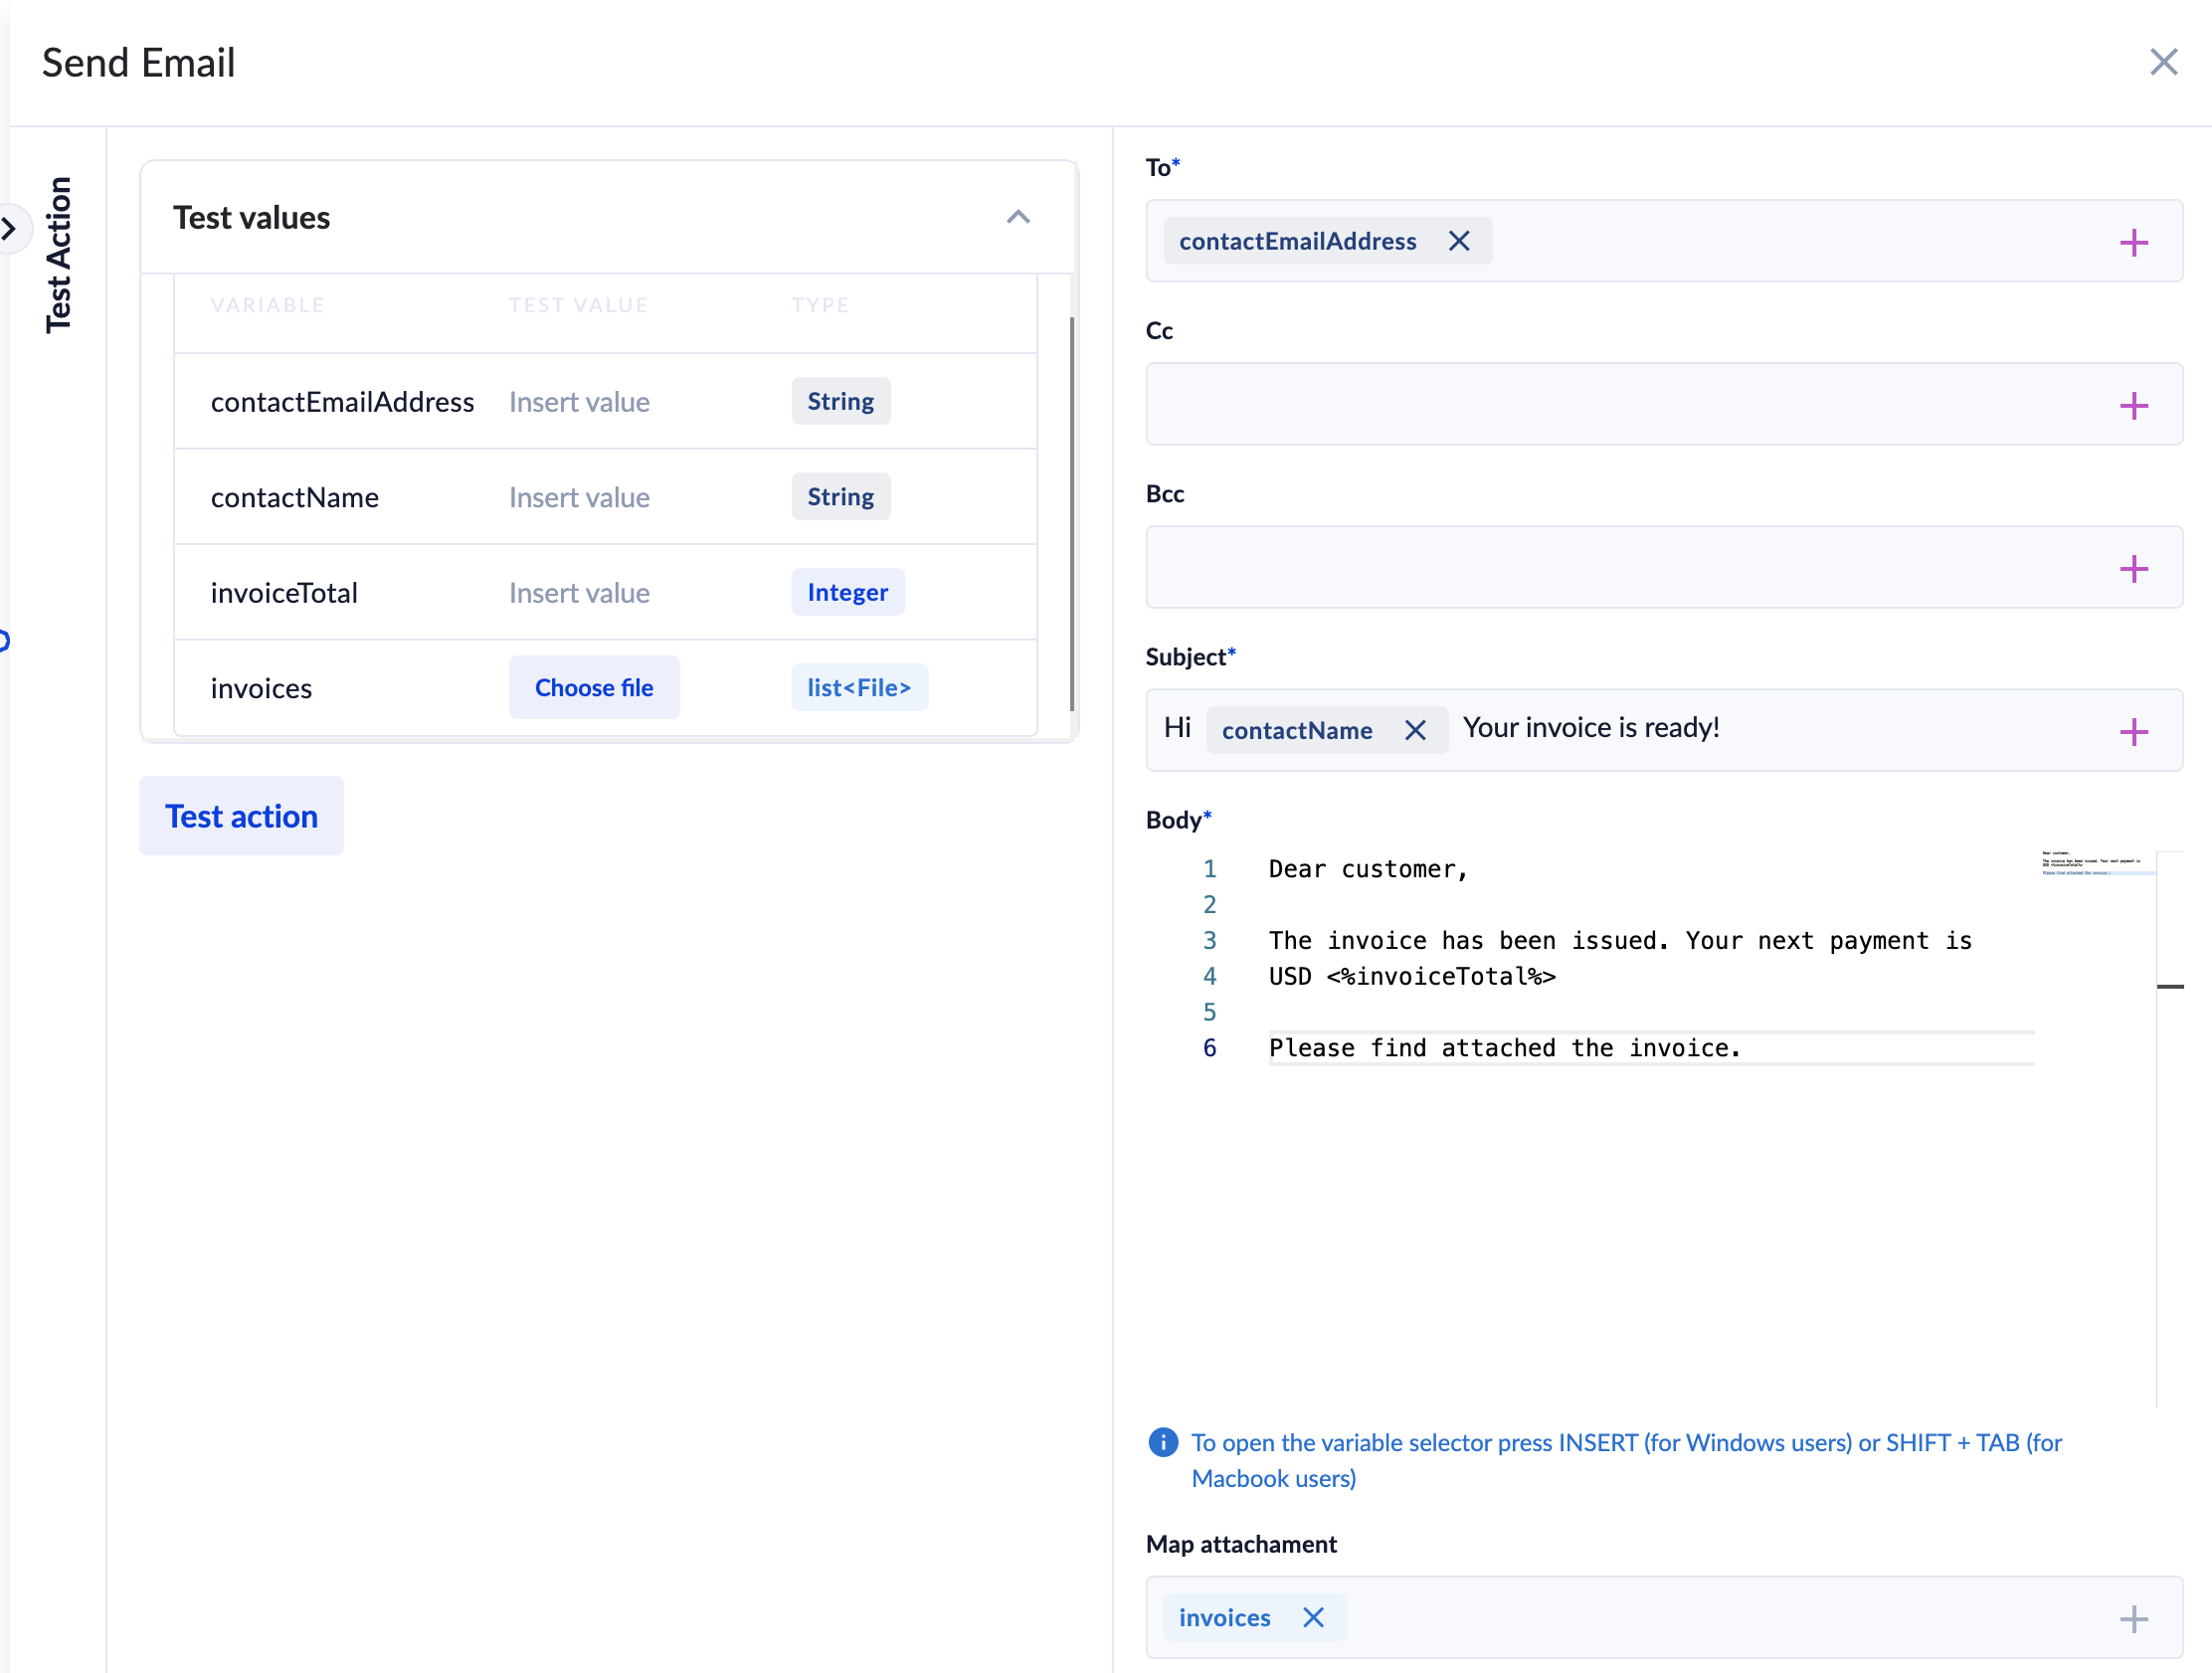
Example of testing an action: In the above example, the email configuration includes 4 variables:
- <%contactEmailAddress%> (used in To)
- <%contactName%> (used in subject)
- <%invoicetotal%> (used in email body)
- <%invoices%> file for attachments
We have assigned values to the process variables and pressed Test Action button.
When testing, you need to ensure that no email gets sent to any customers by accident. For this reason, you should fill in email addresses for test purposes only.
After hitting Test Action button, the “Test output” section will be displayed, where you can see the status of the last action test. The status can be:
- Success: if the action test was successful.
- Failed: if the action test failed.