Process Custom Response
Looking to integrate with a third-party app that requires a response in a specific format? The proposed PROCESIO solution is the Custom Response.…
Looking to integrate with a third-party app that requires a response in a specific format? The proposed PROCESIO solution is the Custom Response. Here's how it works:
When running a process in sync mode using the run endpoint and setting a process custom response, the process will respond with the expected value format as set from within the process.
![]()
Process Import
Both processes created in this document are available for import below. Please check the steps for the input variables values requested when running the processes.
The custom response is passed as a dynamic value through a specific endpoint when the process ends. There are two options for leveraging the Custom Response:
1) Run Sync Endpoint: POST https://webapi.procesio.app/api/Projects/{id}/run
Step 1 - Step 10
2) Get Custom Response Endpoint: GET https://webapi.procesio.app/api/Projects/{id}/instances/{instanceId}/customResponse
Step 1 - Step 17
Visit our Swagger for more details.
Example Process:
Imagine the following use case. As a video game vendor, you are in need of updating prices on multiple platforms. Each platform requires a specific format of the payload to perform the price update. Below is a simplified version.
Extracting the custom response (price) from the API call that returns all the details of a product:
Step 1: Go to the Process Designer and create a new process or open an existing one.
From within a process, create the following variables:
| Name | Type | Single value | Set as |
|---|---|---|---|
| ProductDetailsJson | Json | Yes | Output |
| CustomResponsePrice | Double | Yes | Output |
| StatusCode | Integer | Yes |
The Custom Response variable can have any type depending on the response you are expecting.
Step 2: On the process page, click on the Custom Response icon ⍈:
Step 3: Click on the Add Variable button and select the CustomResponsePrice variable as process Custom Response:
Step 4: In the process builder add the Call API action and the Json Mapper action.
Step 5: Create Rest API Credential and set it's base URL as: https://graph.nintendo.com/ with no authentication.
In the Call API action, use the GET method and set the below mentioned enpoint:
?operationName=ProductsBySku&variables=%7B%22locale%22%3A%22en_US%22%2C%22personalized%22%3Afalse%2C%22skus%22%3A%5B%227100067229%22%2C%227700013808%22%5D%7D&extensions=%7B%22persistedQuery%22%3A%7B%22version%22%3A1%2C%22sha256Hash%22%3A%2243251a1c4b24ba477cc4e12a8fd13e03bcc4dfee223ad0bb8c3792f001a6ebe6%22%7D%7D
| Headers | Value |
|---|---|
| Content-Type | application/json; charset=utf-8 |
Configure the Call API action to get the product details and store them in the ProductDetailsJson variable. (The StatusCode is usefull for debugging).
Step 6: Configure the Json Mapper action by selecting the ProductDetailsJson as input, adding the Query: $.data.products[0].prices.minimum.regularPrice to select only the price value, and store the result in the CustomResponsePrice variable.
Step 7: Validate the process and run it.
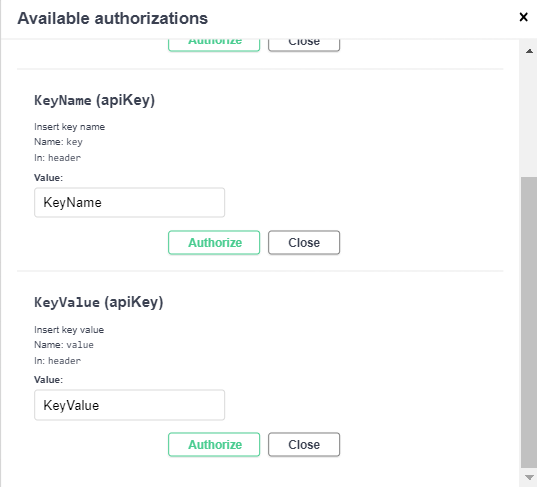
Step 8: Create an API Key, with PROCESIO API Keys.
For Custom Response via synchronous calls we'll use swagger as per below:
Step 9: We'll login to swagger using the previosly generate API Key:
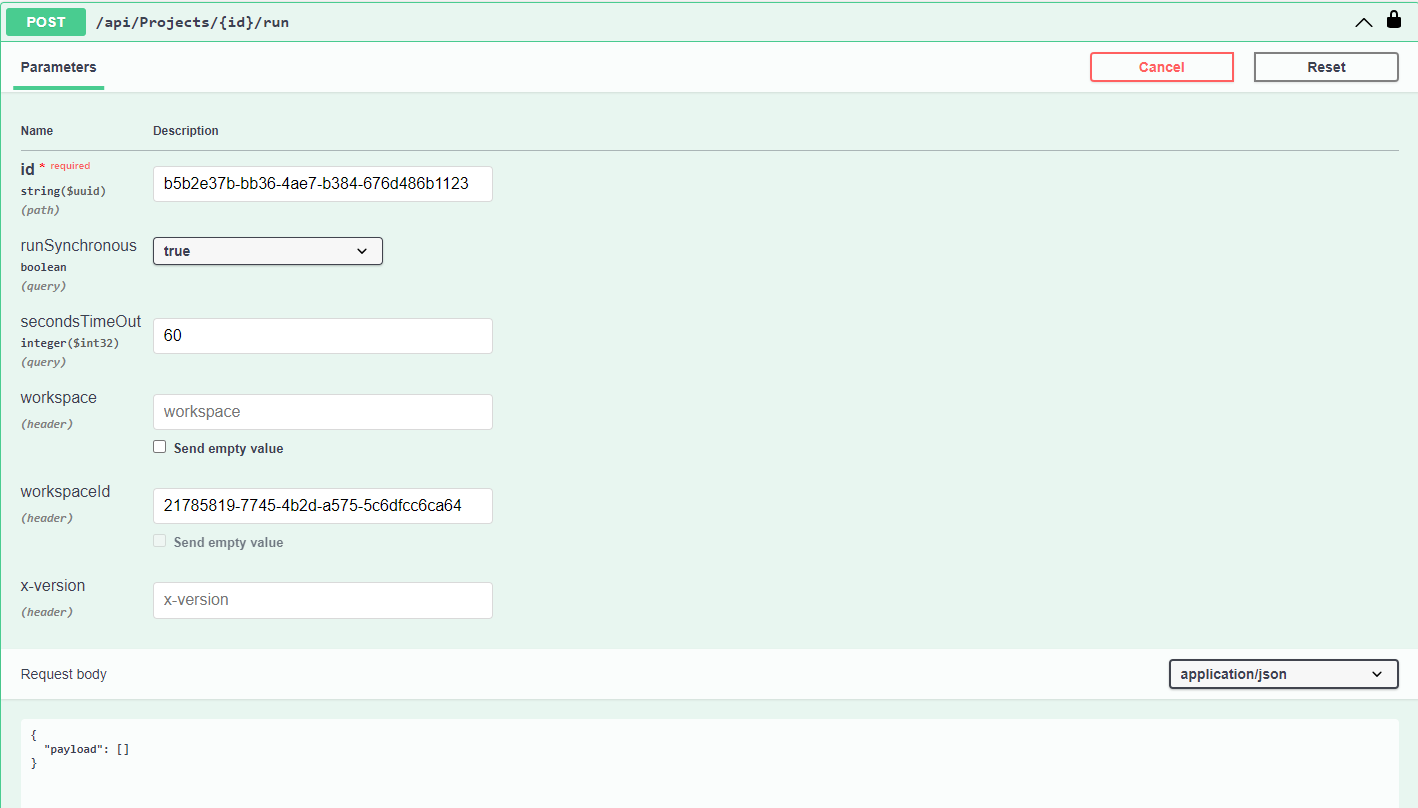
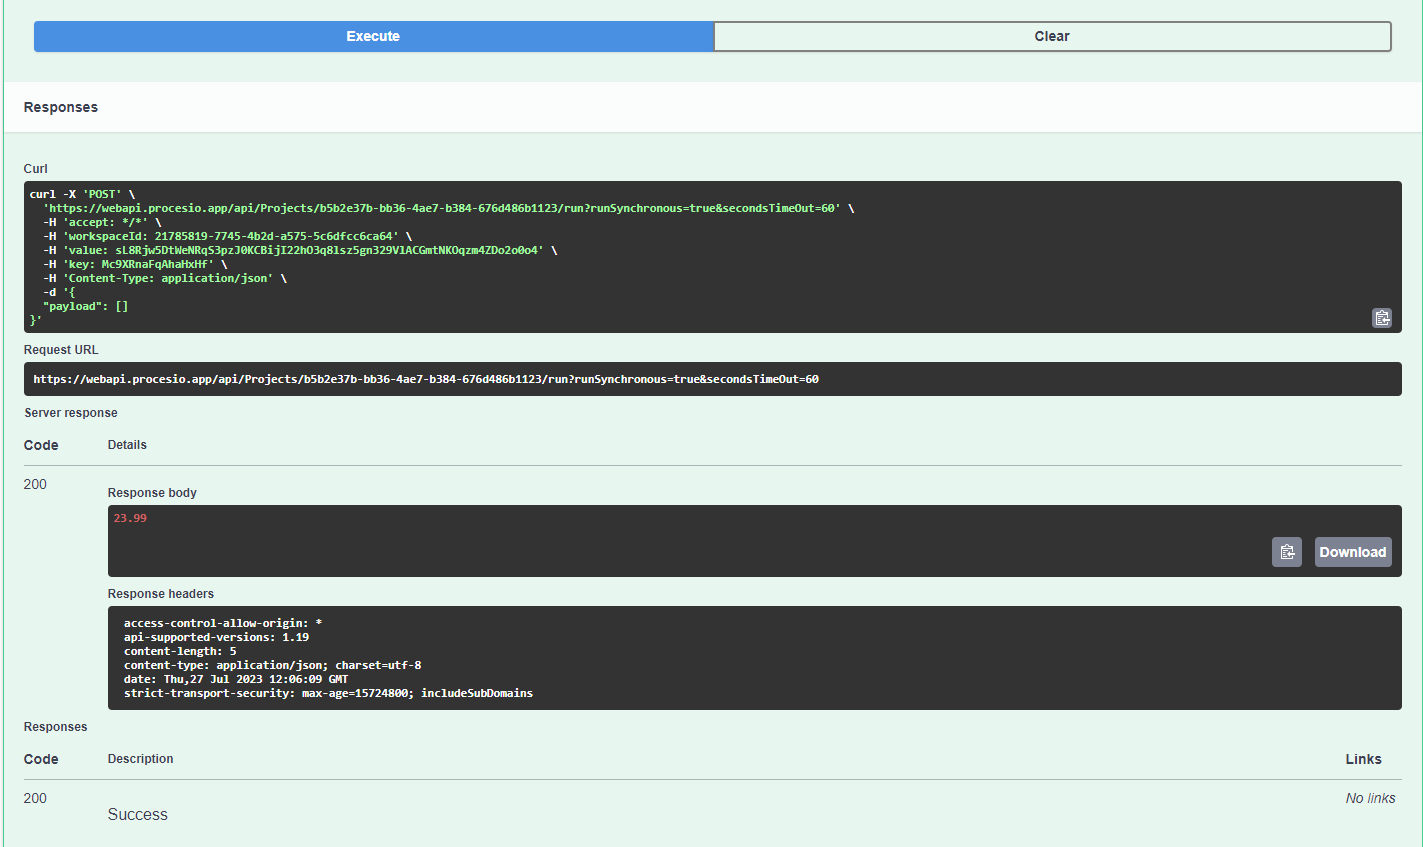
Step 10: using the POST https://webapi.procesio.app/api/Projects/{id}/run endpoint with the following configuration:
- Add the process id
- Set runSynchronous on true
- Workspace name or workspaceID
- Request body:
{"payload": []} - Hit Execute
For obtaining the custom response from an instance you'll need to also follow the steps below
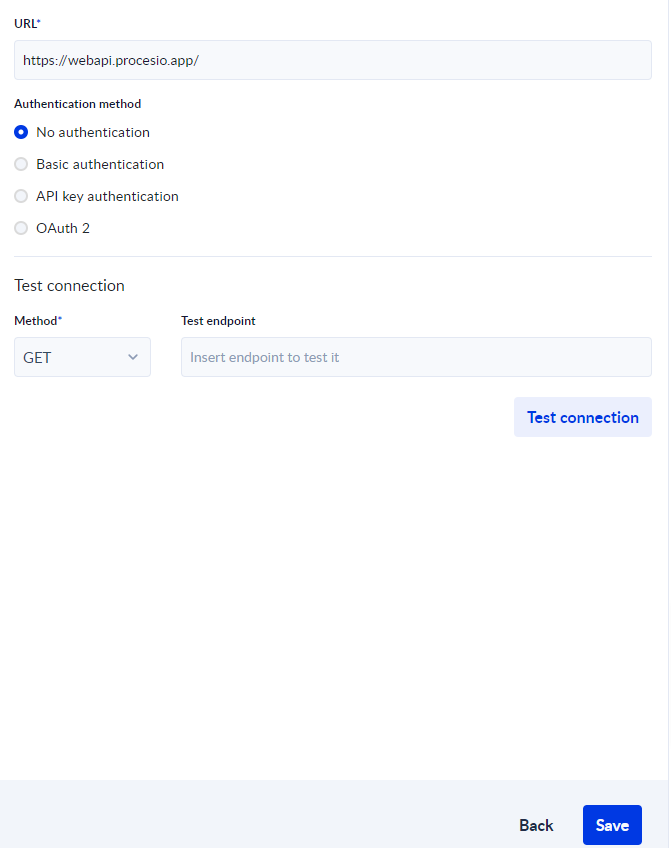
Step 11: Set up a Credential for a RestAPI with the following base URL: https://webapi.procesio.app/
Save the credential without testing it.
Step 12: Create a new process and the following variables within:
| Name | Type | Single Value | Set as |
|---|---|---|---|
| ProcessId | GUID | Yes | Input |
| InstanceId | GUID | Yes | Input |
| CustomResponse | Json | Yes | Output |
| StatusCode | Integer | Yes | |
| WorkspaceId | GUID | Yes | Input |
| ApiKey | String | Yes | Input |
| ApiKeyValue | String | Yes | Input |
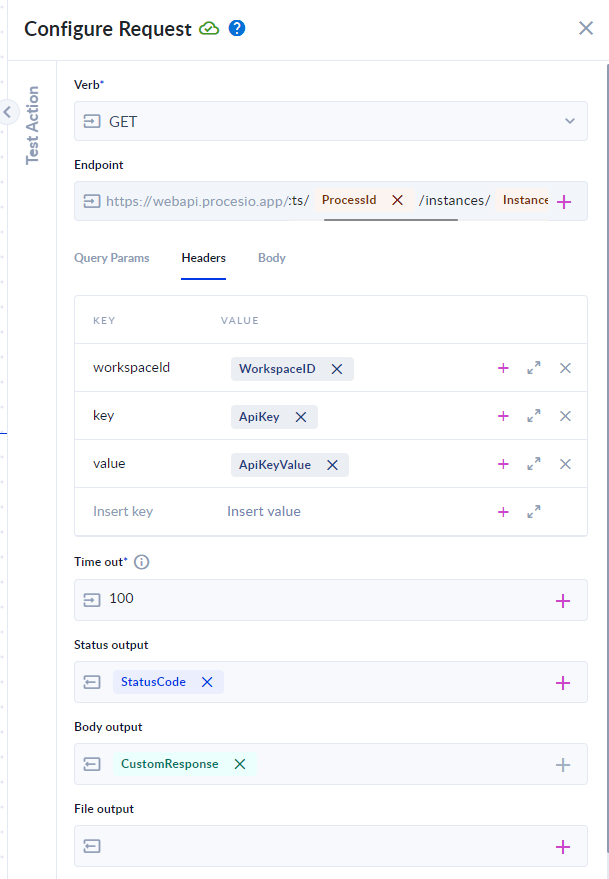
Step 13: Add a call API action. Select the Rest API Credential configured at Step 11.
Configure the request with the Endpoint: /api/Projects/[Id]/instances/[InstanceId]/customResponse
In the Endpoint replace [Id] and [InstanceId] with the variables created at Step 12.
Configure the Call API as per below:
Step 16: Validate and run the process. Obtain the Process Id from witin Process Designer and Instance Id from witin Process Instances for the process ran at Step 1. The WorkspaceID is your workspace id and it can be obtained from within Dashboard. The ApiKey and ApiKeyValue were created at step 8.