

Action Designer
Use the Action Designer to lay out a custom action's inputs and outputs and get the C# class code to start your custom action project from.
The Action Designer helps you start a custom action. You add the fields the action should show in the Process Designer, set each field's direction and type, and the designer writes the C# class for you: the attributes PROCESIO needs and one property per field. You copy that code into your class library project, write the action's logic and build the NuGet package as usual.
The Action Designer does not upload or save anything. To add the finished action to PROCESIO, build the package and upload it as described in Your first Custom action.
Open the Action Designer
In the left menu, open More tools and click Action Designer.
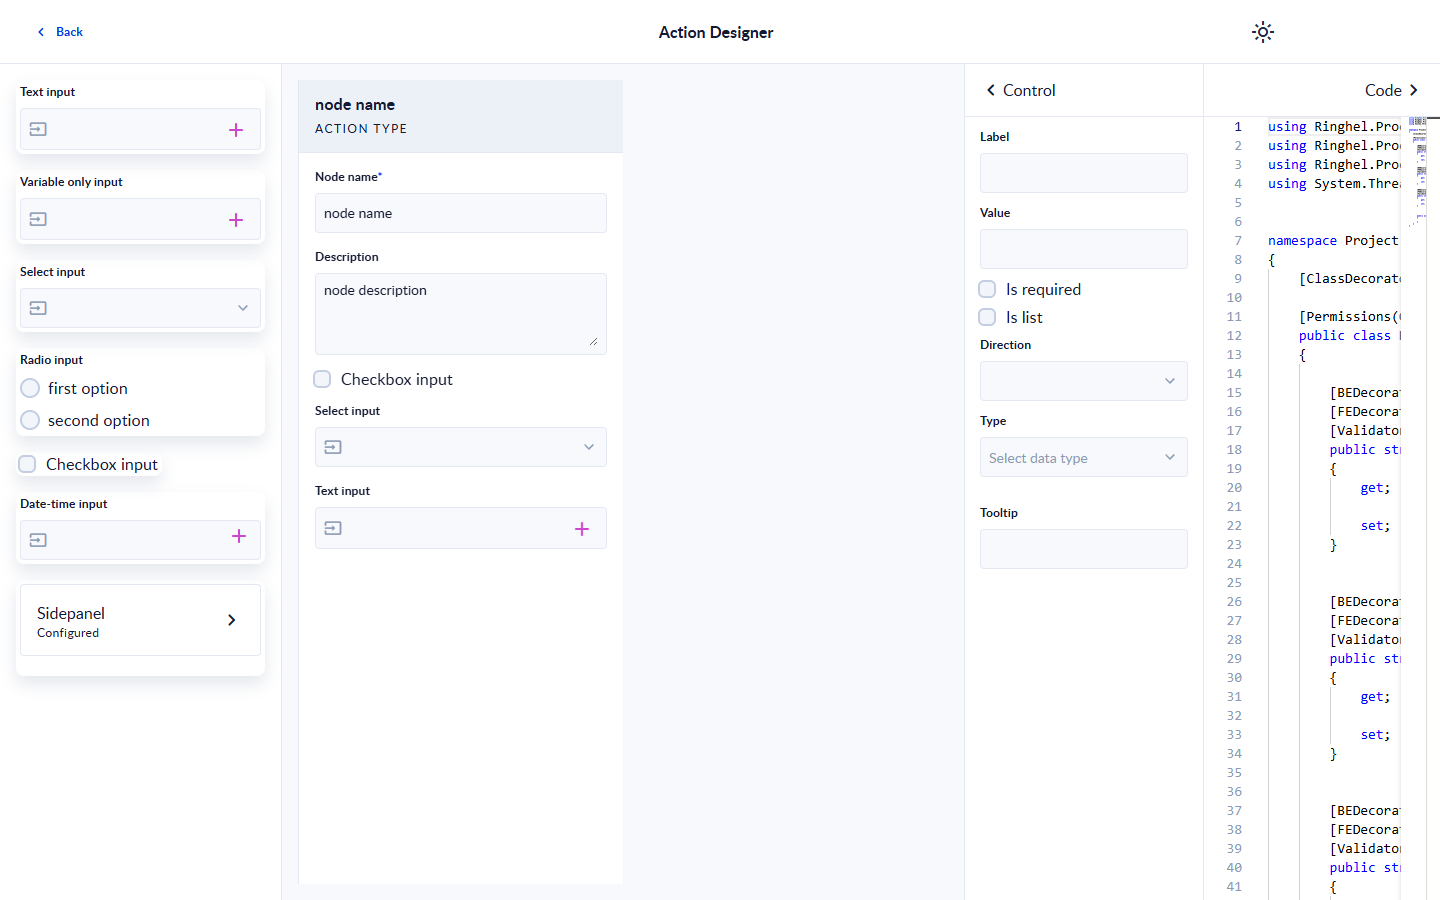
The page has three parts:
- The control list on the left: the kinds of fields you can add.
- The properties panel in the middle: a preview of your action's properties panel. Set Node name (required, up to 32 characters) and drop fields into it.
- The drawer on the right, with two sides: Control shows the settings of the selected field, and Code shows the generated C# code. Click Control or Code to move between the two sides.
Add fields
Drag a control from the list into the properties panel. You can add:
| Control | Field type in the generated code |
|---|---|
| Text input | FeComponentType.Text |
| Variable only input | FeComponentType.DataType |
| Select input | FeComponentType.Select |
| Radio input | FeComponentType.Radio |
| Checkbox input | FeComponentType.Check_box |
| Date-time input | FeComponentType.Date_Time |
| Sidepanel | FeComponentType.Side_pannel: a group of fields shown in a side panel. |
The Frontend decorator page explains each field type.
Click a field in the properties panel to edit it on the Control side of the drawer:
| Setting | What it changes in the code |
|---|---|
| Label | The field's label. The property name is made from it. |
| Is required | Whether the user must fill in the field. |
| Is list | Whether the field holds a list of values instead of one value. |
| Direction | Input, Output or Input/Output. |
| Type | The data type of the field. Simple types become the matching C# type, for example Integer becomes int and Boolean becomes bool. A data model becomes object. |
Use the generated code
Open the Code side of the drawer. It shows a complete class that implements IAction, named after Node name, with:
- the
ClassDecoratorandPermissionsattributes on the class; - one property per field, with its
FEDecorator,BEDecoratorandValidatorattributes; - an empty
Execute()method.
Copy the code into your class library project, then:
- Review the class attributes. The designer fills in default values, such as the category, the shape and the tooltip, that you will want to change. See Class decorator.
- Complete the field attributes that the designer does not write, such as tooltips and the options of select and radio inputs. See Frontend decorator and Frontend select decorator guide.
- Write the action's logic in
Execute(). - Build the NuGet package and upload it.
Your first Custom action
In the following article we will learn how to create a simple Custom action and how to add it to our flow.
Custom action decorators
A decorator is a structural pattern that allows adding new behaviors to objects dynamically by placing them inside special wrapper objects. Using…