

Document template creation
Build a document template in the Document Designer: variables, data-model tables, formatting, Code View and everything else the editor offers.
PROCESIO lets you work with documents by creating your own templates and filling them with your process data. The Document Designer gives you full control over how the data is presented, and with variables you can turn a static document into a dynamic one.
The Document Templates list
Open Document Designer in the left menu to see every template you can access.
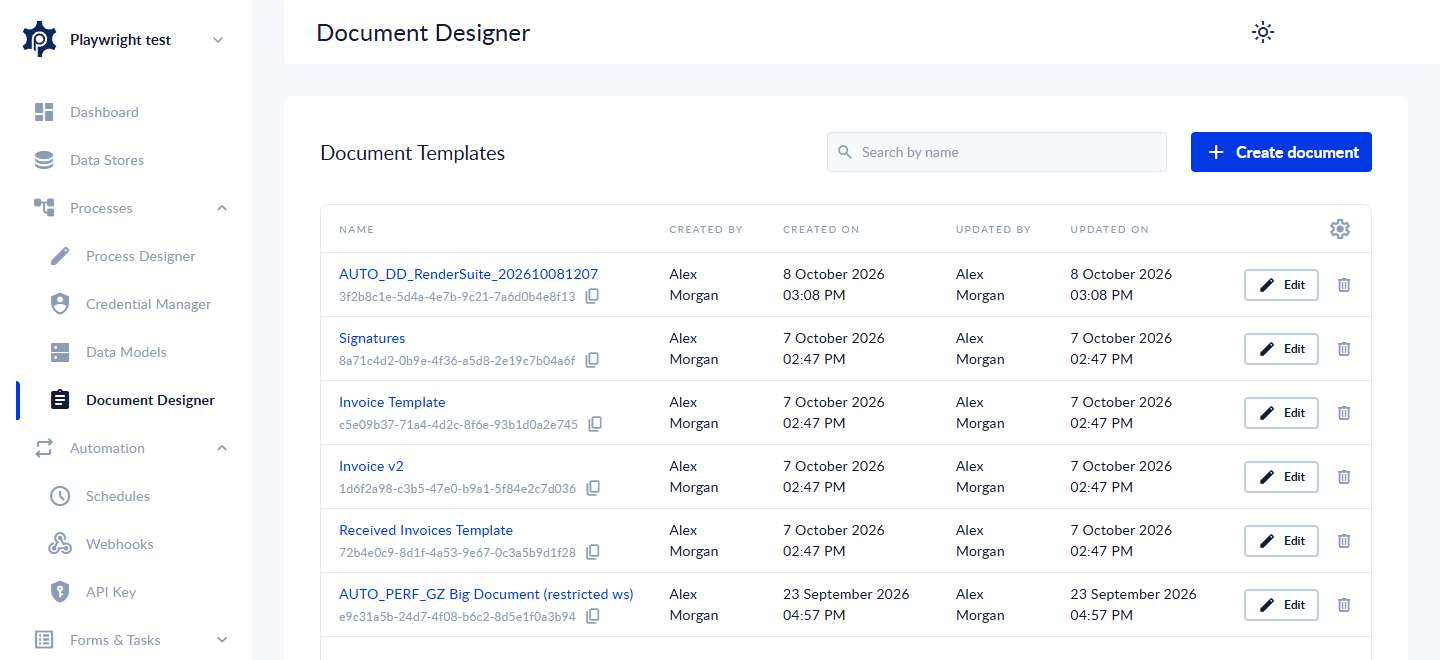
- Search by name filters the list as you type.
- + Create document opens a new, untitled template in the editor.
- Each row shows the template's name and id (click the copy icon to copy the id), who created and last updated it, and when.
- Edit opens the template; the trash icon deletes it, after a confirmation dialog — this can't be undone.
Create document, Edit and Delete only show up if your role has the matching permission on Document Designer. A read-only user sees the list without these buttons.
Building a template
- Click + Create document. You land in the editor with an empty page.
- Give the document a name by clicking the pencil next to Untitled Document at the top (up to 64 characters).
- Create the variables you want to use, add your text, images and tables, and place the variables where their value should appear.
- Click Save Document.

Leaving the page with unsaved changes shows a "Are you sure you want to leave?" dialog with three options: Save & Exit, Exit without saving, and Cancel. Edits made only in Code View (see below) are the one exception — see the Code View section.
The editor
The Document Designer shows your template as pages, at the page size and orientation the final document will have, so what you see on screen is close to the generated file. There's no font-family choice: the generated PDF always uses the same embedded font (DejaVu), so the font menu is switched off and the page shows text in that font.
The toolbar is grouped, and each ⋮ button expands a row of less-common tools for that group:
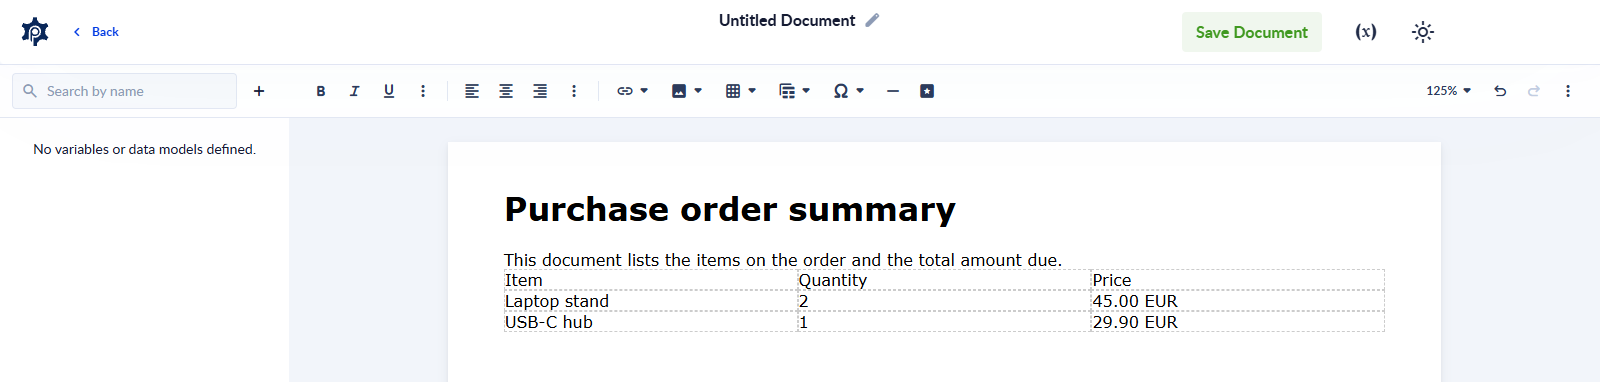
| Group | Always visible | Under ⋮ More … |
|---|---|---|
| Text | Bold, Italic, Underline | Strikethrough, Subscript, Superscript, Font Size, Text Color, Background Color, Clear Formatting |
| Paragraph | Align Left / Center / Right | Ordered/Unordered List (with style variants), Paragraph Format (Normal, Heading 1–4, Code), Paragraph Style (Gray, Bordered, Spaced, Uppercase), Line Height, Decrease/Increase Indent |
| Insert | Link, Image, Table, Dynamic Table with Data Model, Special Characters, Horizontal Line, Insert Page Break | — |
| View | Zoom, Undo, Redo | Select All, Document Page Size, Document Page Orientation, Code View |
On an empty line a floating + button offers a quick shortcut to insert an image, a 2×2 table, a list or a horizontal line. A second + appears in the gap next to a table, a horizontal line, a page break or an image on its own line, to add a text line there.
Formatting text and paragraphs
-
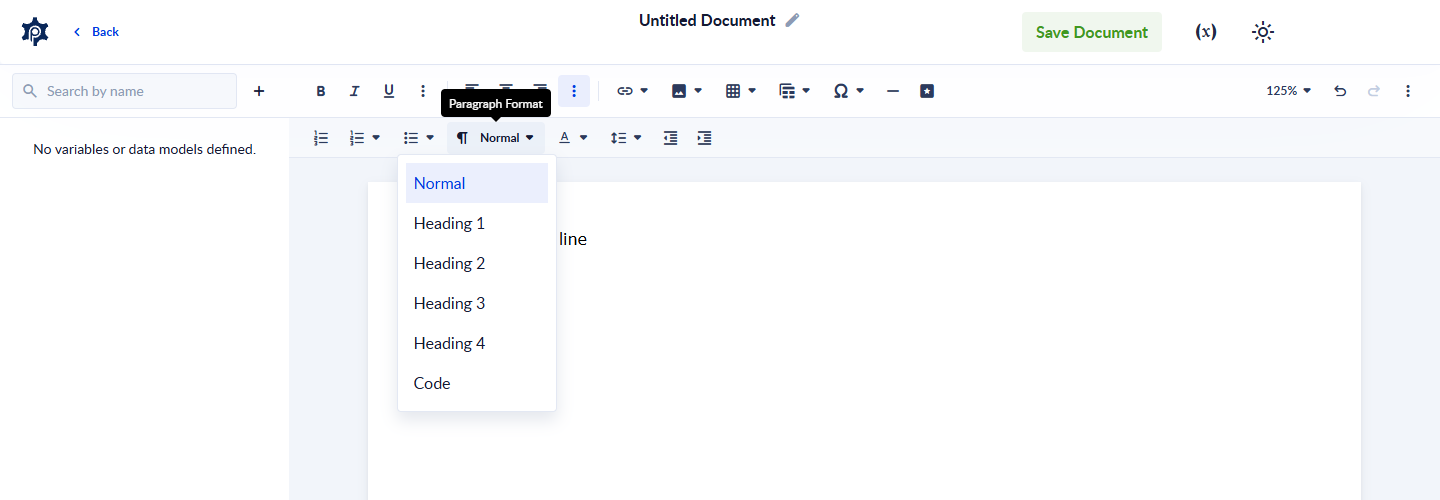
Paragraph Format turns the current paragraph into Heading 1–4, plain text (Normal) or a code block (Code).
-
Font Size offers 8 to 96 px; Text Color / Background Color open a panel of 27 color swatches, a Clear colour swatch and a hex input.
-
Line Height offers Default, Single, 1.15, 1.5 and Double; Increase/Decrease Indent moves the paragraph by 20 px per click.
-
Useful shortcuts: Ctrl/Cmd+B/I/U for bold/italic/underline, Ctrl/Cmd+S for strikethrough, Ctrl/Cmd+K to open the Link panel, Ctrl/Cmd+P to open the Image panel, Ctrl/Cmd+]/[ to indent/outdent.
Images
Click Insert Image (or Ctrl/Cmd+P):
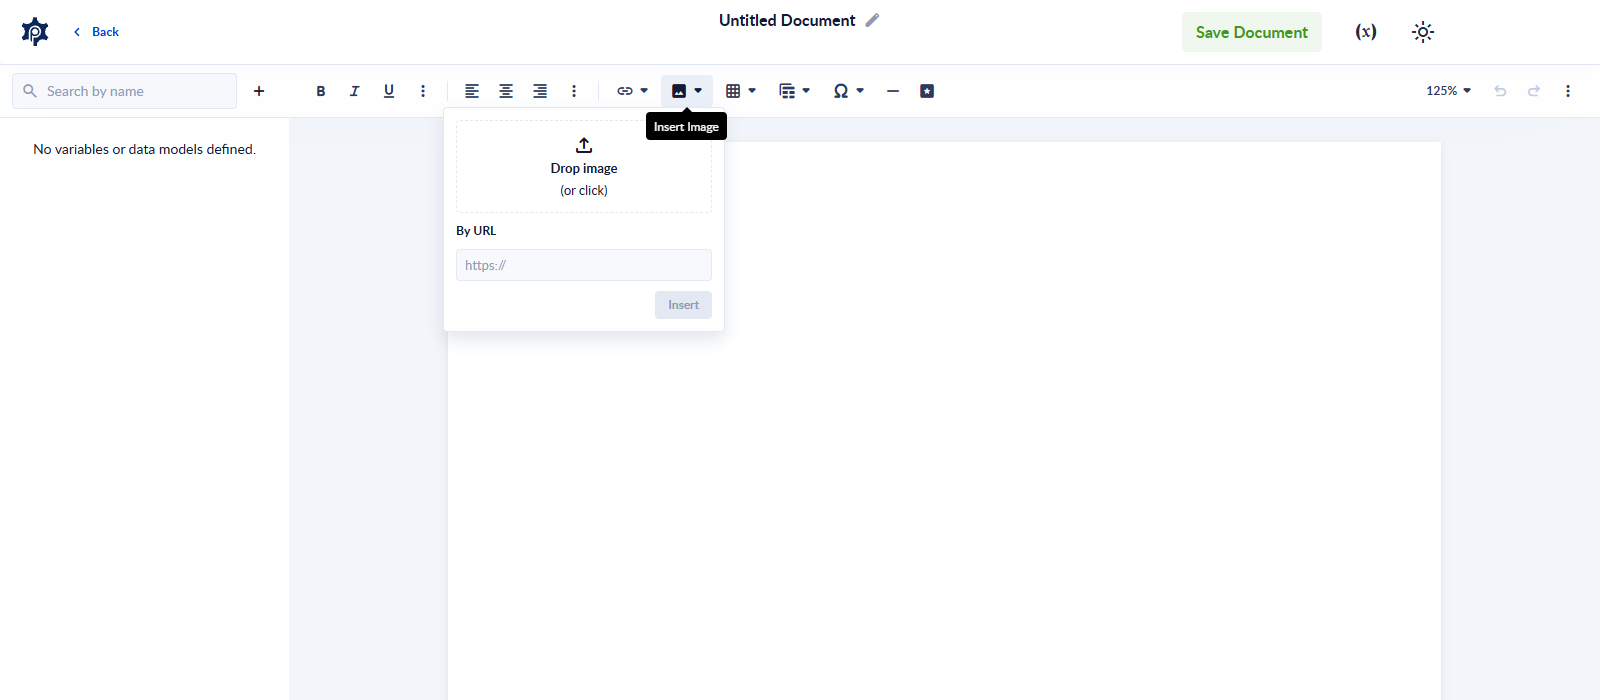
- Drop image (or click) opens the file picker, or drag a file onto it — the image is embedded in the document.
- By URL loads the image before inserting it; a link that doesn't load answers "Image cannot be loaded from the passed link".
- Once inserted, select the image to resize it by dragging any of its four corner handles (16 px minimum width), or use the contextual toolbar that appears: alignment, Image Display (inline or break the text), Image Style, Alternative Text, Caption, Image Size (type an exact width/height, in px or %), and Image Link.
Links
Click Insert Link (or Ctrl/Cmd+K):
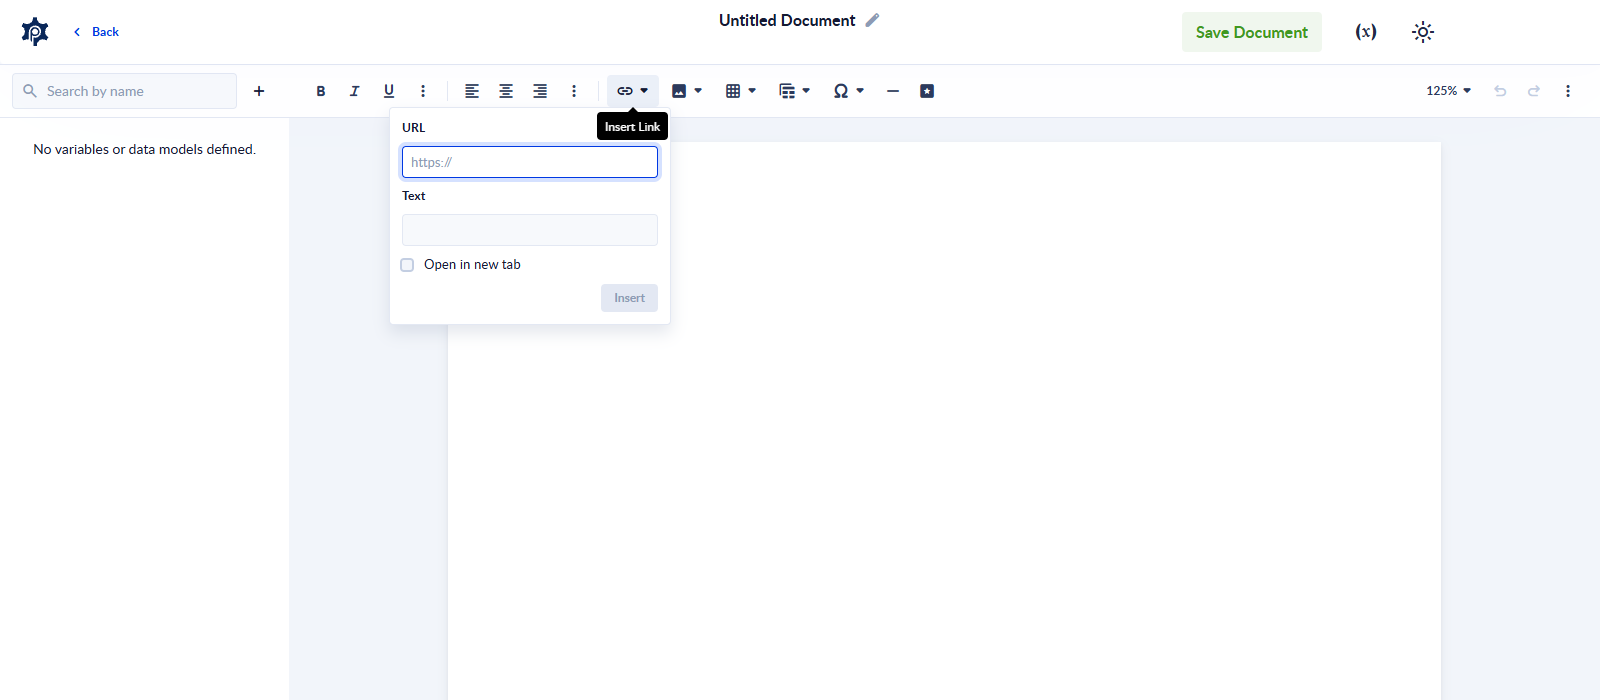
Type the URL and the Text to show, and tick Open in new tab if needed. An address that looks like an email (name@domain.com) is automatically turned into a mailto: link.
Tables
Insert Table opens a grid picker — hover to pick a size up to 10×10 and click to insert it. Once your caret is in a table, a contextual TABLE / CELL toolbar appears with everything you need:
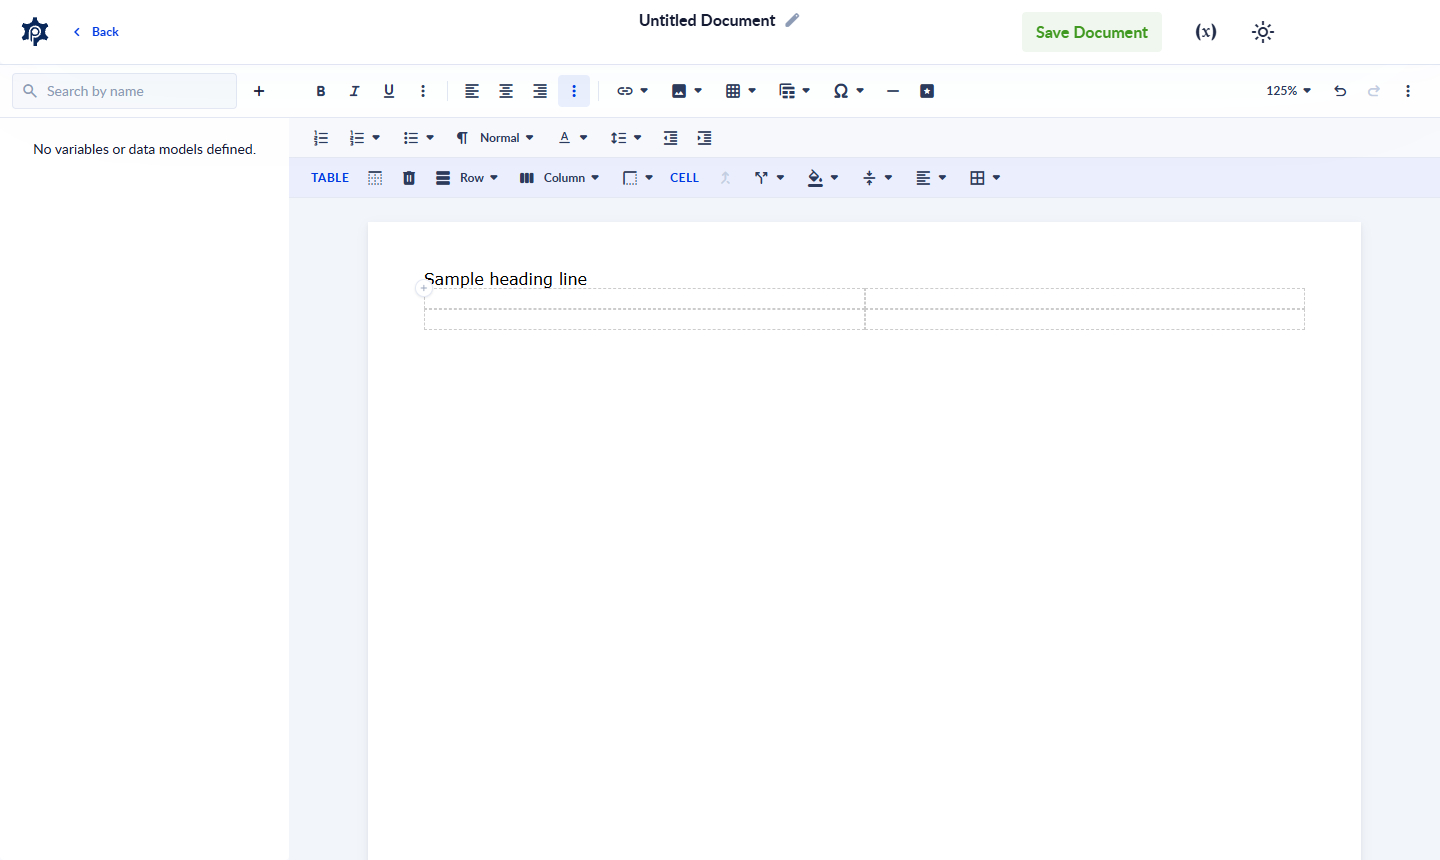
- TABLE: Table Header (turns the current row into a header row), Remove Table, Row / Column menus (insert/delete/move), Table Style (dashed borders, alternate rows).
- CELL: Merge Cells, Split Cell, Cell Background, Vertical/Horizontal Align, Cell Style.
- Hovering near a table's top or left edge shows a small + that inserts a row or column at that spot.
Special characters and other inserts
Special Characters opens a tabbed panel (Latin, Greek, Cyrillic, Punctuation, Currency, Arrows, Math, Misc):
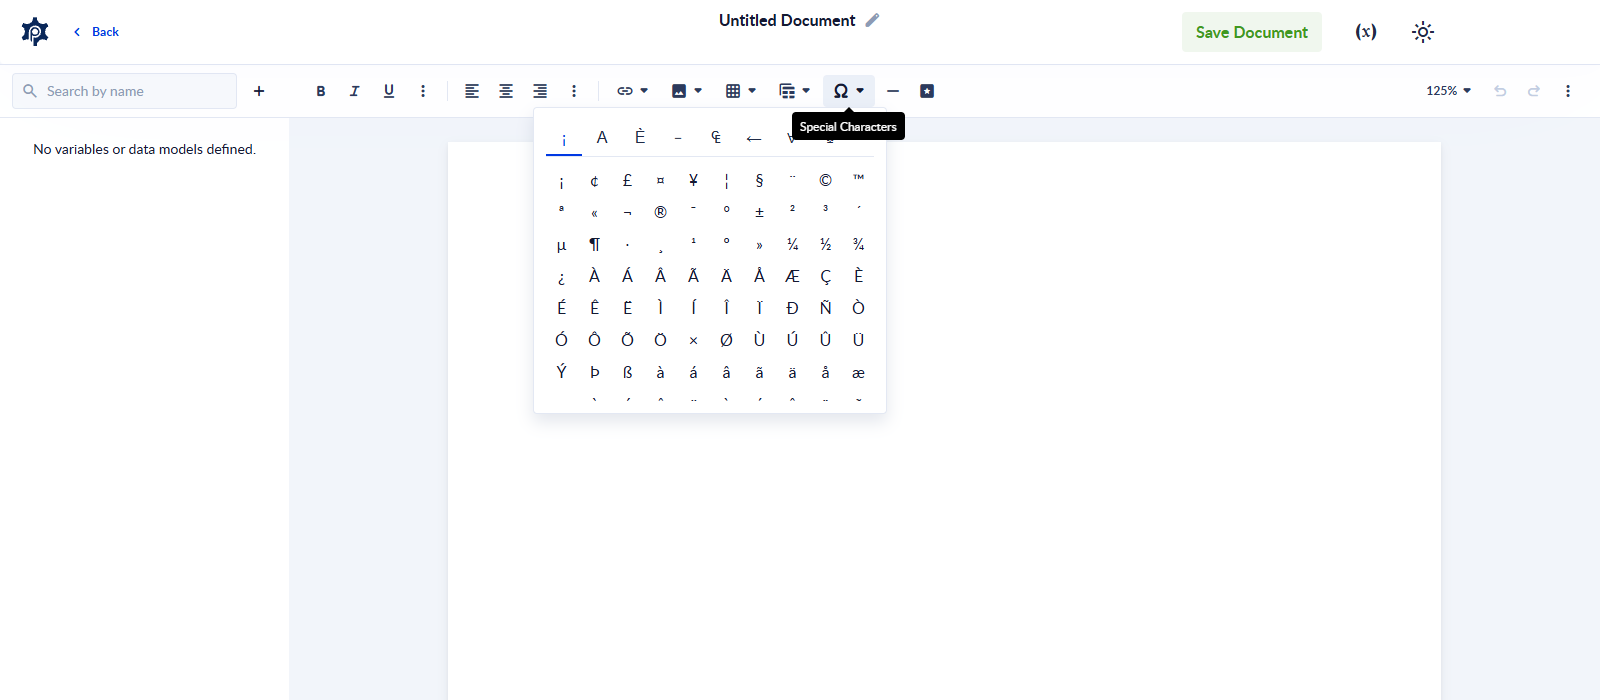
Insert Horizontal Line adds a divider. Insert Page Break forces a manual page break and moves the caret to the new page — use it instead of relying on content to overflow naturally.
Variables
Variables are what make a template dynamic: a value filled in at generation time (see Using the template) replaces the variable everywhere you've placed it.
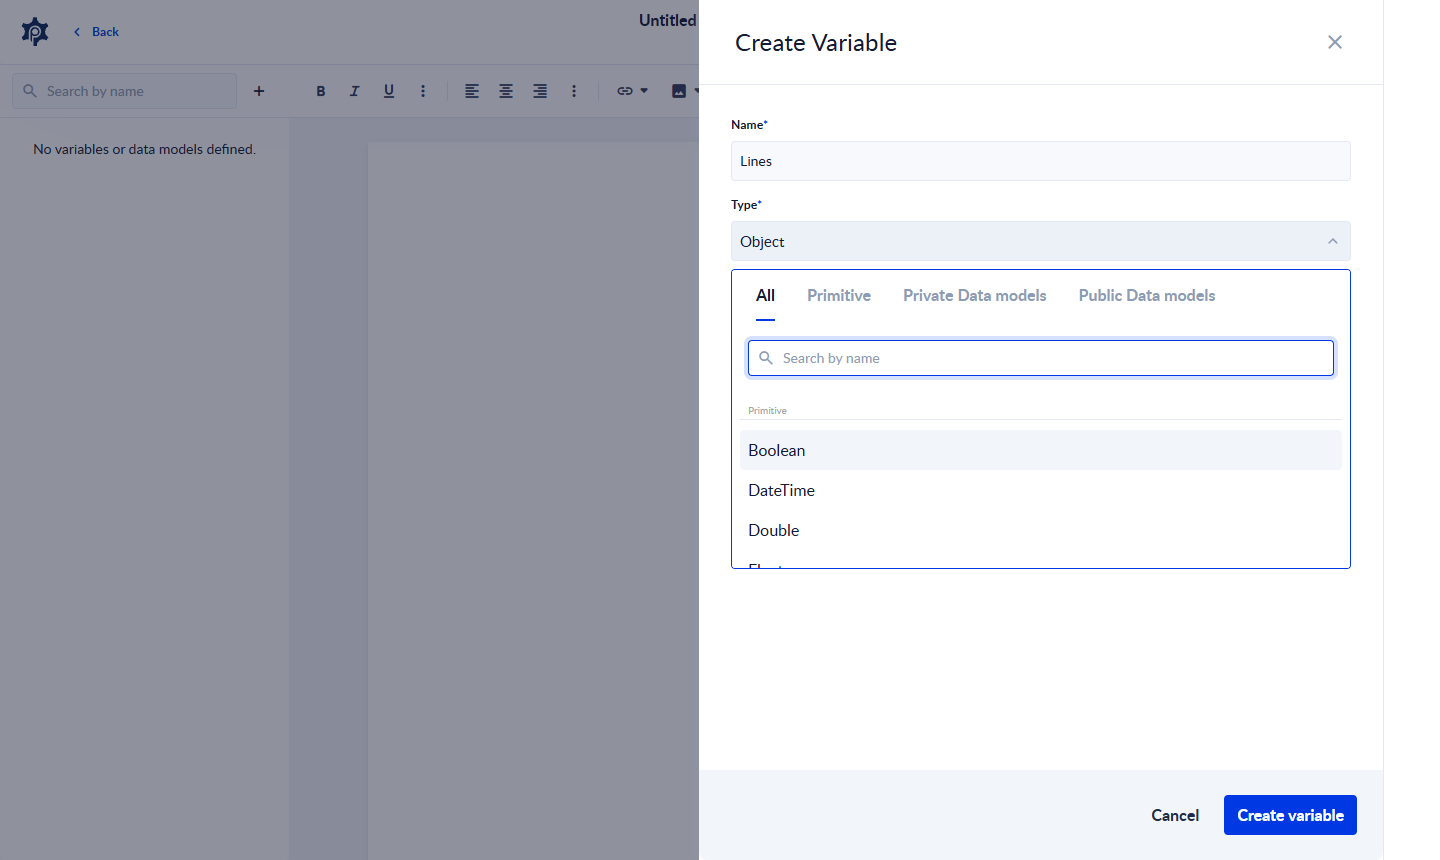
- Click + next to Search by name in the left sidebar to open Create Variable.
- Fill in:
-
Name — required, up to 64 characters, no spaces or special characters, and must be unique in the template.
-
Type — a primitive (Boolean, DateTime, Double, Float, Guid, Integer, Json, Object, String) or any Data Model you have access to, searchable and grouped into All / Primitive / Private Data models / Public Data models tabs.
-
Default value — optional (not shown for a File-typed variable).
-
Single Value or List — pick List to bind a repeated set of rows (used by the Dynamic Table, below).
-
- Click Create variable. The sidebar shows it with its type, e.g.
list<InvoiceLine>.
To use a variable, click it in the sidebar — it's inserted as a pill at your cursor (there's no drag-and-drop). Click an inserted pill's body to reopen Edit Variable; click its × to remove just that placeholder from the document. A pill picks up any Bold/Underline/Strikethrough/color formatting you apply around it. If you later delete the variable itself, every pill that used it is marked as broken (a distinct style, tooltip "… (variable no longer exists)") — re-create the variable or remove those pills before you save.
A Data Model variable also lists its attributes in the sidebar; click an attribute to insert just that field (e.g. the invoice's customer address) as its own pill.
Under the hood, each pill is saved as <%variableId%> (or <%variableId.attributeId%> for an attribute) — you never see or type this yourself; it's purely how the template stores the placeholder.
Dynamic Table with Data Model
When you have a list variable of a Data Model type (like Lines: list<InvoiceLine> above), Dynamic Table with Data Model builds you a starting table for it:

Pick the variable from the dropdown. The designer inserts a table with one header row (the model's attribute names) and one data row, pre-filled with a pill for each attribute — at generation time, that row repeats once per item in the list, so you end up with one printed row per invoice line, order item, and so on. Edit the header text or column widths as you like; the pills are what drive the repeat.
Code View: HTML and preview side by side
Click ⋮ More Misc, then Code View. The template's HTML opens on the left (a Monaco code editor) and a live preview updates on the right as you type. Drag the divider between them to resize the panes (or use the arrow keys when it's focused). Click Code View again to return to the visual editor.
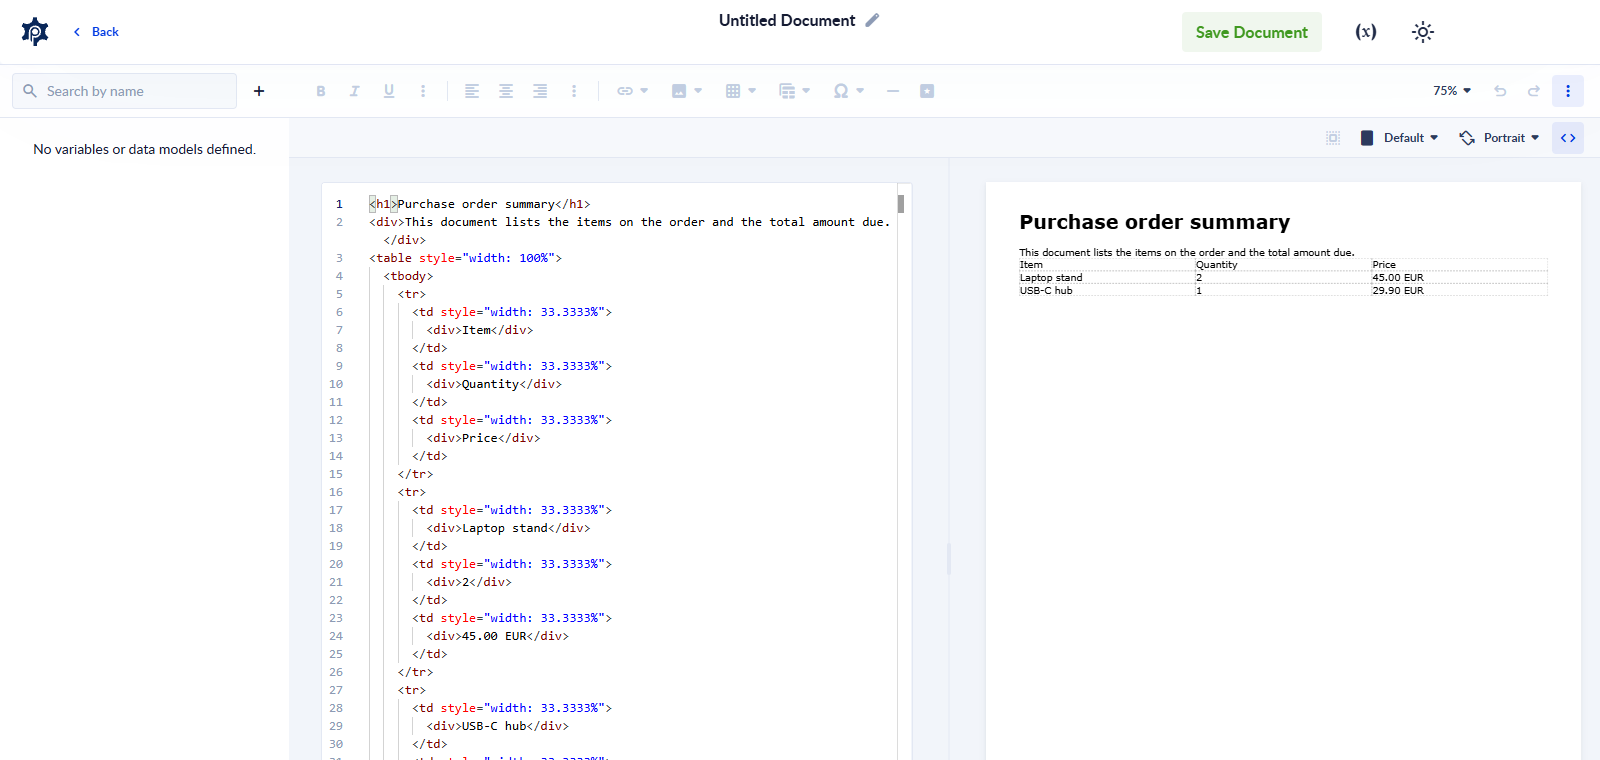
Before you leave the page, click Save Document or switch back to the visual editor: a change made only in the HTML pane isn't counted as unsaved yet, so leaving with Back can lose it without a warning.
The preview doesn't apply a template's own <style> block; it shows it as a placeholder. Inline styles are applied, and the generated document uses the <style> block as usual.
Templates made before this editor open as they are, with their variables intact. The first time you save one of these older templates, the editor tidies up its HTML — the text stays the same, but check spacing and any data-model tables with a test document afterwards.
Pasting from Word, Excel or Google Docs
Pasting from Word, Excel or Outlook keeps paragraph styles and spacing, and converts Word's numbered/bulleted lists into real lists; Office-only markup is stripped. A picture that's only on your computer (not a URL) is recovered from the clipboard and embedded — if that fails for some images, you'll see a "Some images could not be pasted" notice. Pasting from Google Docs goes through the general paste path (no Word-specific list/picture handling), which covers its usual text and formatting.