

Airtable
Procesio will allow you to integrate your third party platforms in your projects bringing new functionalities to your sales, marketing and support…
Procesio will allow you to integrate your third party platforms in your projects bringing new functionalities to your sales, marketing and support teams using a low-code environment to automate repetitive tasks. One such platform is Airtable, whose marketing and reporting functionalities will bring an extra boost in your efficiency department. In the following you will learn how populate your contacts table hosted on Airtable with Procesio.
We are assuming that you already signup on Procesio and Airtable. If not then first create the accounts and activate them.
You can use the Credentials Manager to configure the authentication credentials of the Airtable REST API by following the following steps:
Create the credential
1. Navigate to the Credentials Manager section.
2. Select the Add New button from the upper right corner.
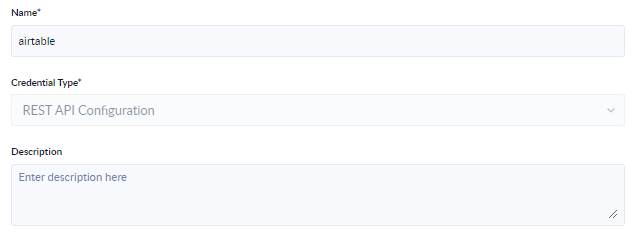
3. Give a Name to the newly created connection, select Rest API Configuration from the Credential Type dropdown and optionally add the Description.
4. Click Next step.
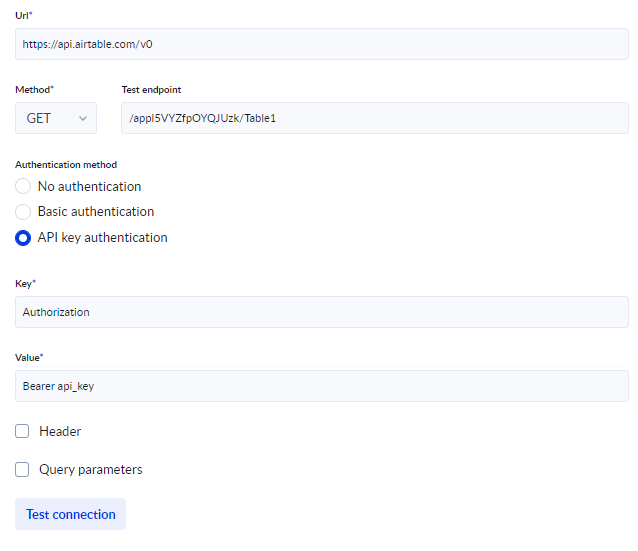
5. Add the Api URL and authentication, test the connection and click Next step. The API key can be found in your Airtable account.
Create and configure the process
1. After creating the flow with the aid of the drag and drop functionality you can give the Call Api Action a name, description and from the Select Api Configuration dropdown select the connection created at step 5.
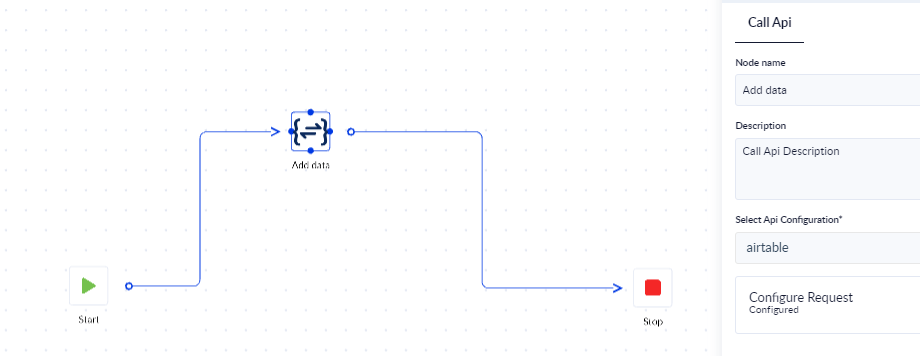
2. Click Configure Request button.
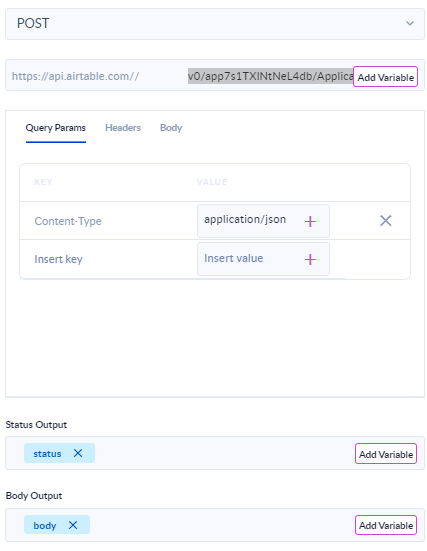
3. Now we will use the Post verb to add data tour table using in this example the v0/app7s1TXlNtNeL4db/Applicants endpoint that is unique for each account and will be provided by Airtable. You will need to select the specific airtable project/table to view the specific endpoints, they can be found by visiting https://airtable.com/api.
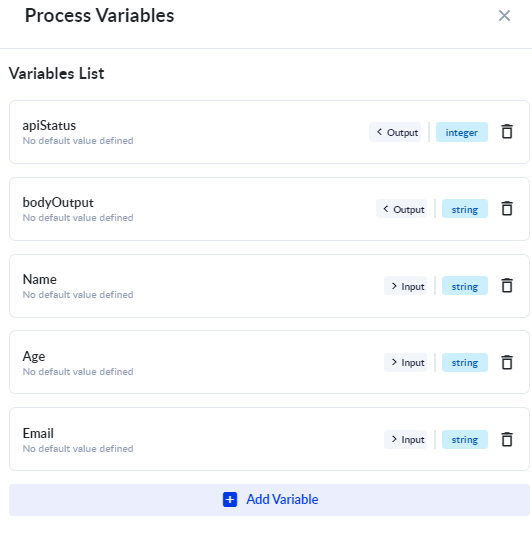
4. Add the variables that will be used in this process:
- Mandatory : <%Name%>, <%Age%>, <%Email%>, <%Phone%>, <%Notes%>.
- Optional (are used for debugging): <%apiStatus%>, <%bodyOutput%>.
5. In the Query Params add the Content-Type as application/json.
6. In the body section you will need to enter the new entries to the table in Json format according to the Airtable Api documentation:
{
              "records": [
                 {
                    "fields": {
                    "Name": "<%Name%>",
                    "Age": "<%Age%>",
                    "Email": "<%Email%>",
                    "Phone": "<%Phone%>",
                    "Notes": "<%Notes%>"
                } }
                      ], "typecast": true
}
7. From the upper right corner you will need to Save the process, Validate the process and click Run.
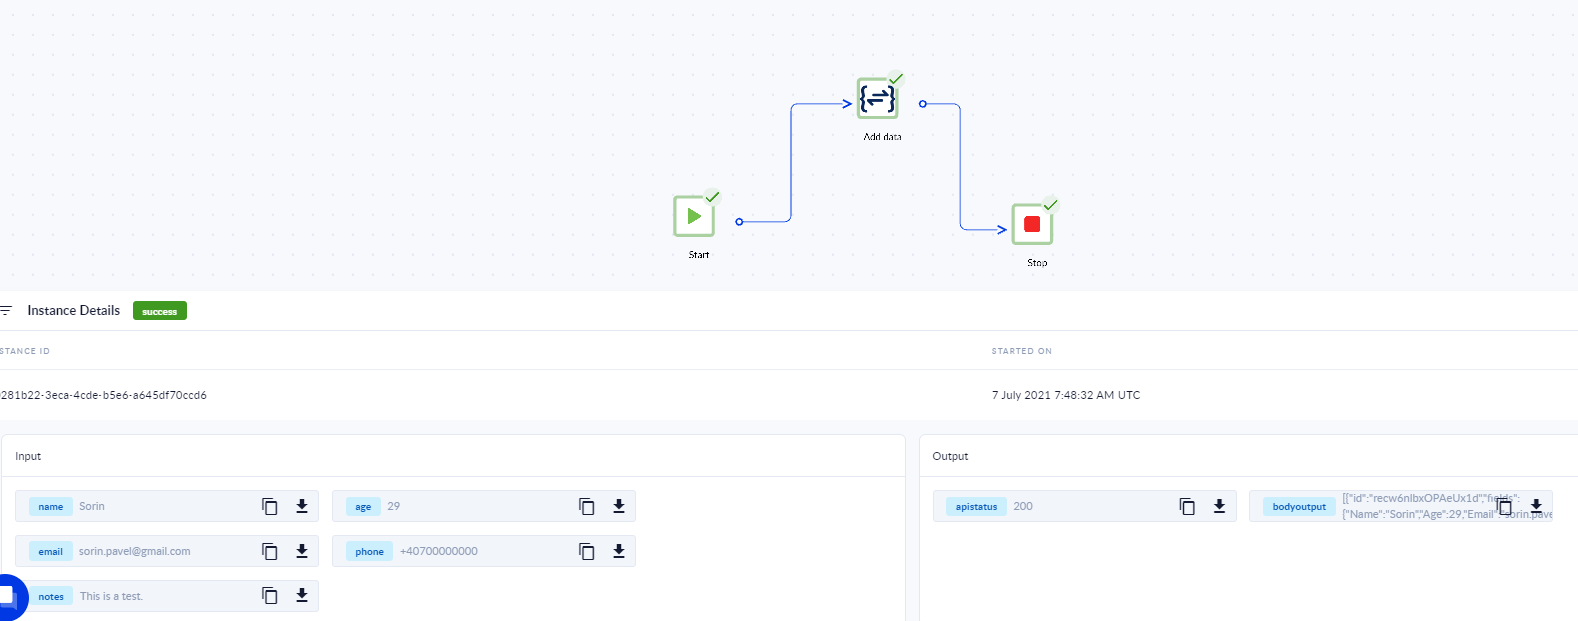
8. By clicking the Check Instance button you can see the resulting input and output variables, and if the result was not a success we can check the output messages to debug the flow configuration. You can download the .json file by clicking the down arrow.
SendinBlue
Procesio helps you create a flow that is custom to your email sending needs by allowing you to customize the process according to your sending…
Yahoo
Yahoo is one of the most well known email services out there and the SMTP service they offer for free can be easily used in conjunction with your…