

SMSO
Procesio allows the integration of powerful marketing tools that meet your SMS sending needs by creating the logic of your campaigns in a no-code…
Procesio allows the integration of powerful marketing tools that meet your SMS sending needs by creating the logic of your campaigns in a no-code environment where you can custom the flow that best fits your needs.
We are assuming that you already signup on Procesio and SMSO. If not then first make an account and activate them.
Use the Credential Manager to configure the authentication credentials of the SMSO REST API by following the following steps:
SMSO
1. Login to your SMSO account.
2. Navigate to API in the Integrari section to see your api key.
3. The SMSO REST API documentation can be found here.
Procesio
1. Navigate to the Credential Manager section.
2. Select the Add New button from the upper right corner.
3. Give a Name to the newly created connection, select Rest API Configuration from the Credential Type dropdown and optionally add the Description.
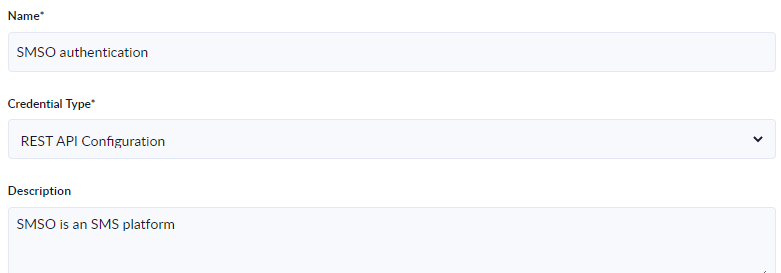
4. Select the Next step button.
5. Enter the SMSO API connection data as shown in the screenshot with the mention that in the Value field you will need to enter your SMSO API key.
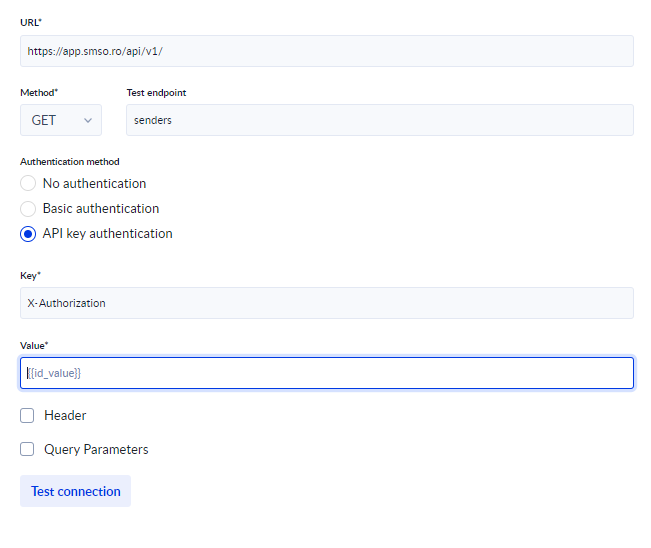
6. When you click the Test connection button Procesio will test the connection and give the Successfully tested! message.
7. Save the connection.
8. Create a process using your newly created connection.
9. After creating the flow using the drag and drop functionality you can give the Call Api Action a name, description and from the Select Api Configuration dropdown select the connection created at step 7.
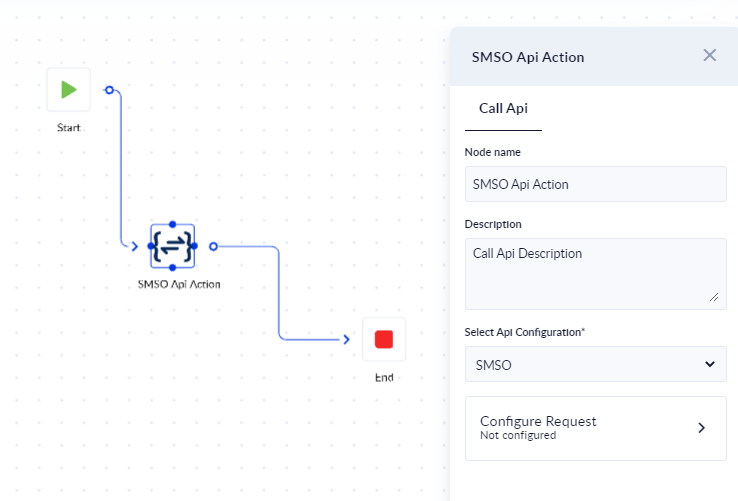
10. Click the Configure Request button.
11. To send a sms message we will use the POST verb with the /api/v1/send endpoint and according to the SMSO API documentation the to, body and sender parameters. For the dynamic content, we will use input process variables and one output variable to check the output status.
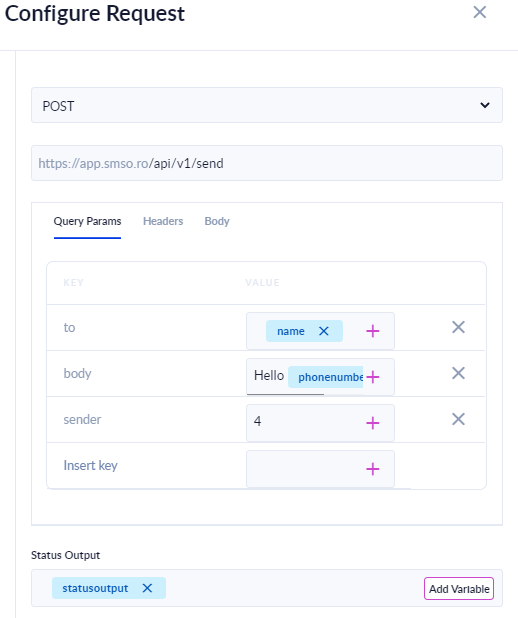
12. From the upper right corner you will need to Save the flow, Validate the flow and click Run.
13. A prompt will appear that will ask you to enter the input variables.
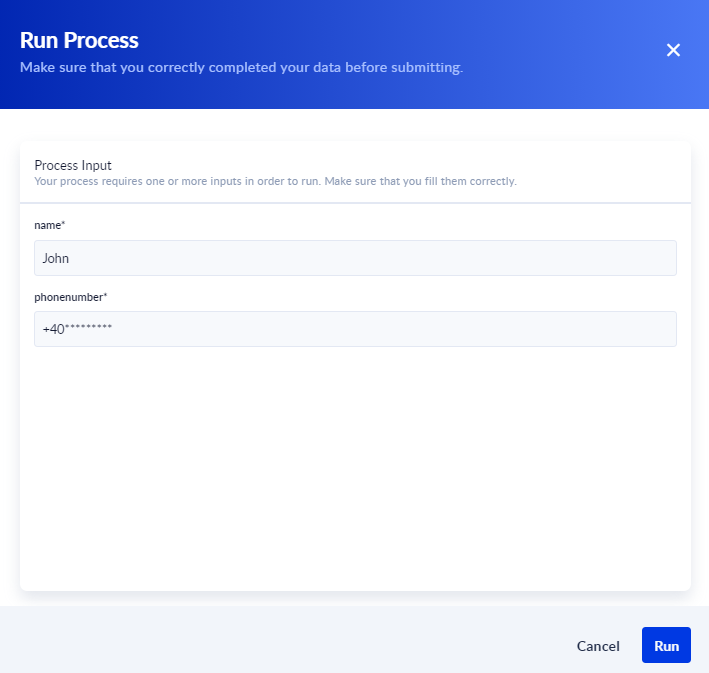
14. Click Run.
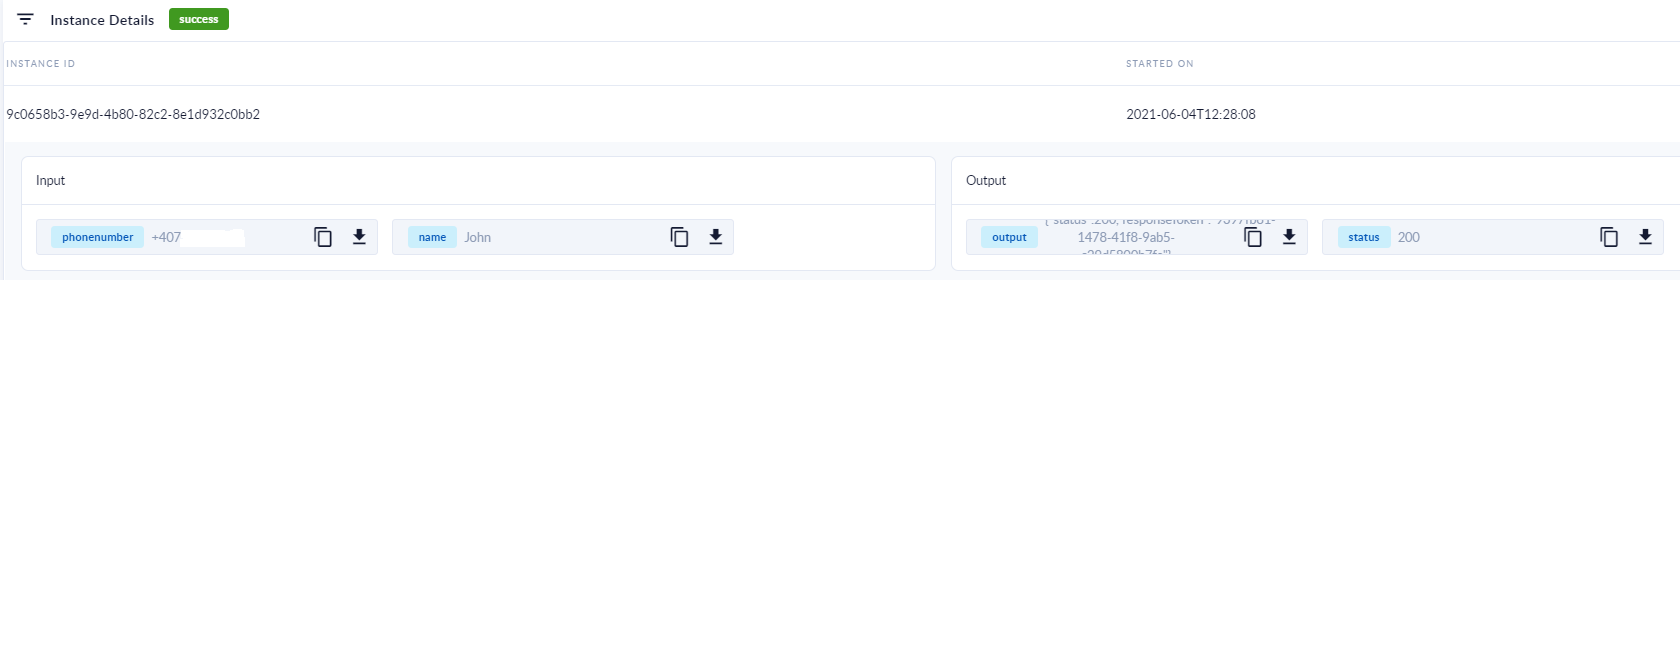
15. By clicking Check Instance you can see the resulting input and output variables, and if the result was not a success we can check the output messages to debug the flow configuration.
SendSMS
With Procesio you can administrate your SendSMS marketing account and campaigns in a no-code environment where your marketing department can…
WebFlow
Procesio allows the creation of custom flows that meet your business need to interact with and automate repetitive tasks that work with projects and…