
Custom URLs
Give your forms and webhooks readable addresses made of your company's name, a workspace name and a name of your choice, plus a short link.
A custom URL gives a form or a webhook a readable address that you choose, instead of an address made of IDs. A custom URL has three parts:
/<master workspace URL>/<sub-workspace URL>/<form or webhook URL>For example, /acme/finance/expense-claim. The first part is set once for the whole enterprise account, the second once per sub-workspace, and the third for each form or webhook.
Each form or webhook with a custom URL also gets a tiny URL: a short, generated address of about ten characters that works on its own, without the workspace parts.
Custom URLs need an enterprise account with a master workspace. The form and webhook part can be set only after the master workspace URL and the sub-workspace URL exist.
URL rules
Every part of a custom URL:
- is 3 to 32 characters long;
- uses only the letters
A–Zanda–z, the digits0–9,_and-; - must not already be taken. If it is, you see "This custom URL is already taken."
Click Generate next to a field to fill it with a random 12-character value.
Set the master workspace and sub-workspace URLs
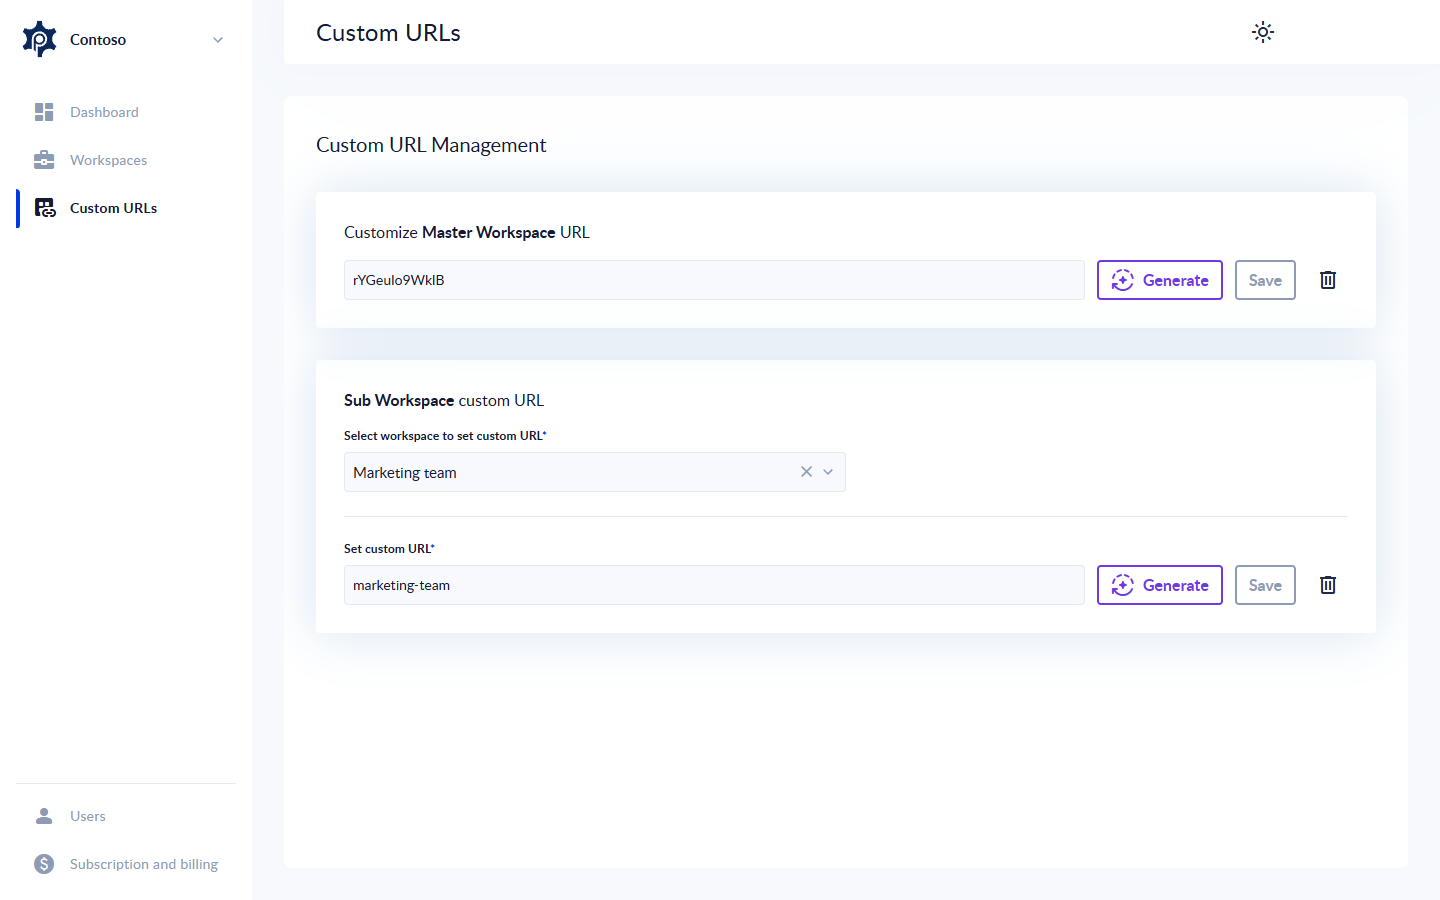
- Switch to the master workspace and click Custom URLs in the left menu. The Custom URL Management page opens.
- Under Customize Master Workspace URL, type the account's part and click Save.
- Under Sub Workspace custom URL, pick a workspace in Select Workspace to set custom URL, type its part in Set custom URL and click Save.
- Repeat step 3 for each sub-workspace whose forms or webhooks should get custom URLs.
Changing or deleting the master workspace URL or a sub-workspace URL changes the address of every custom URL that uses it. Links you have already shared stop working. The delete dialog warns you: "Are you sure you want to delete this custom URL? it can break existing custom links."
Give a form a custom URL
- Open the form in the Form Designer. It must be saved at least once.
- Open the Custom URL tab on the side. The tab is shown only when the master workspace URL and the sub-workspace URL are set.
- Under Customize Form URL, type the form's part, or click Generate, then click Save. You see "Custom URL was saved."
- Use the copy icon to copy the full address. After the first save, the Tiny Form URL is shown above, with its own copy icon.
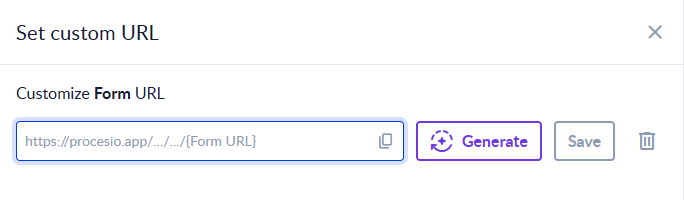
To change a form's URL, type a new one and click Save. To remove it, click the delete icon next to the field. Saving needs permission to update forms; deleting needs admin permission on forms.
Give a webhook a custom URL
A webhook can get a custom URL after it has been saved. Open the webhook with Edit, set its part in the Custom URL section and click Save. The webhook then shows a Webhook Custom URL and a Webhook Tiny URL, each with a copy icon. See Webhooks.
Related
Rename a workspace
Rename a workspace or a master workspace from its Dashboard, who can do it, and the rules a workspace name must follow.
Two-factor authentication
Turn on two-factor authentication (2FA) for your account, require it for everyone in a master workspace, and what users see when a workspace requires it.