

Form chains
Follow one request through every form and step it passes, and choose which form fields show as columns in the Chains list.
A chain follows one request from its first submission to its last step. It groups everything that belongs to the same piece of work:
- Every submission starts a chain. A simple form that is submitted once is a chain with one step.
- Each step of a task form is added to the chain. When a form has assignees or approvers, every submission of a step (for example the requester's part, then the manager's approval) adds a step to the same chain.
- A form opened from another form joins its chain. When a form's Trigger form event opens a second form, the second form's submission joins the first form's chain. This happens when the person filling it is signed in and works in the form's workspace. Otherwise the second form's submission is saved on its own.
See the chains of a form
- Go to Forms & Tasks > Form Designer and open Submissions for the form.
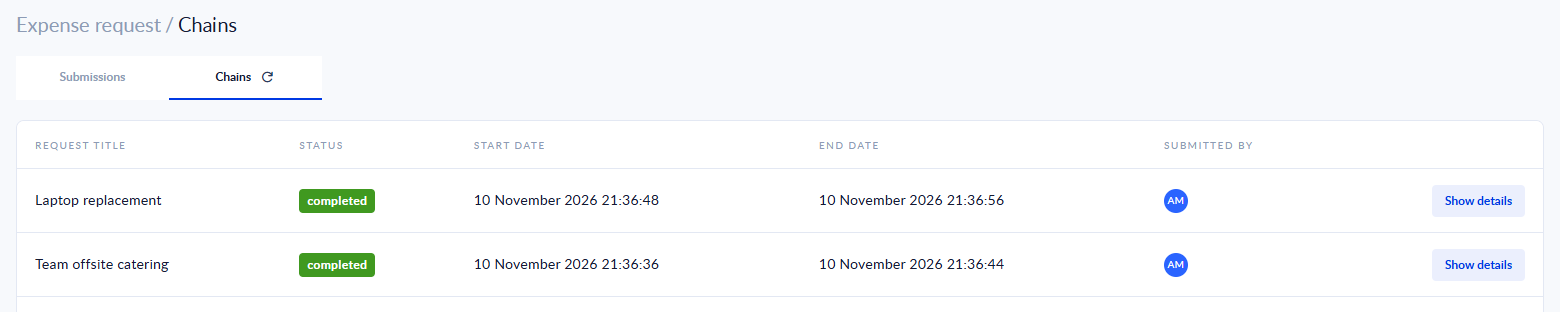
- Switch from Submissions to Chains at the top of the table. The reload icon next to Chains refreshes the list.
The Chains list has one row per chain, with these columns:
| Column | What it shows |
|---|---|
| STATUS | The state of the chain's latest step: in progress, completed, approved or rejected. A chain is in progress while a step is still waiting for someone. |
| START DATE | When the chain started. |
| END DATE | When the chain finished. |
| SUBMITTED BY | The people who submitted its steps. |
| Your additional columns | The values of the form fields you chose in Flow settings. See below. |
Open one chain
Click Show details on a row. The chain page shows a summary at the top (Start date, End date, Status, Submitted by) and one row per step, with the form and step name, its status, dates and the person who submitted it. Click Show step details to see what was submitted in that step. You can reload this page; it keeps its own address.
Add columns to the Chains list (Flow settings)
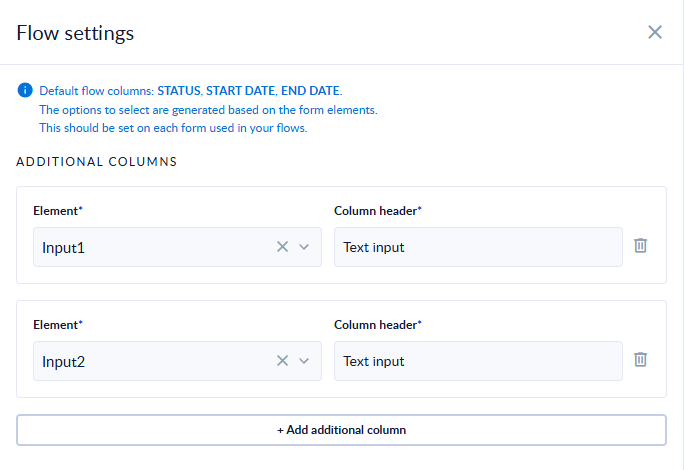
By default, the Chains list shows STATUS, START DATE and END DATE. To show the value of a form field as well:
- Open the form in the Form Designer.
- In the side tabs on the right, click Flow settings (the workflow icon).
- Click + Add additional column.
- In Element, pick the form element whose value you want to see. The list shows the elements of this form.
- Column header is filled in from the element's label. Change it if you want a different title. It is required.
- Add more columns the same way. Drag a column to change the order, or click the delete icon to remove it.
- Click Save in the panel, then save and publish the form.
Set the columns on each form that takes part in your chains, not only on the first one.
Related pages
For support, please join our Discord community for further assistance and support.